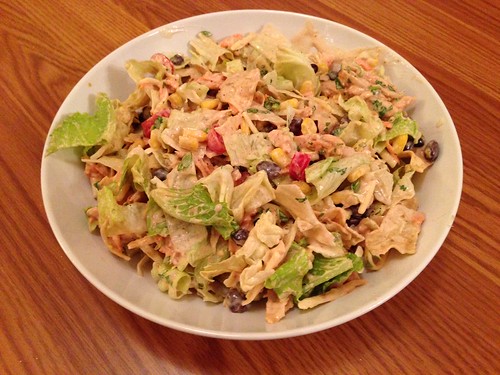
Have you guys heard of Stonefire Grill? They've got locations throughout Southern California. I've never been to one but the day we flew to the West coast for Thanksgiving my stepmom got one of their salads for us for dinner. She tossed it all in a big bowl and, to look at it, it looked like a regular old salad. In fact, I didn't even try any of it at first because there was other stuff to eat. But my sister-in-law kept raving about how good it was so I made myself a small bowl. And then another and another, unable to comprehend how such ordinary ingredients could come together into something so amazing.
I went online to see if anyone had tried to recreate the Stonefire Grill BBQ Chopped Salad at home. Lo and behold, someone did. I finally got around to putting it on the menu and all I can say is wow.
This recipe is pretty much spot-on. Which is great because we live in PA and don't get out to CA very often. Now I can enjoy this salad whenever I want.
Stonefire Grill BBQ Chopped Salad
As seen on Come Fly with Me
1/2 head iceberg lettuce, chopped
1/2 head romaine lettuce, chopped
1 cup black beans
3 ears fresh corn, cooked and corn kernels removed (or 1 cup frozen)
3/4 cup chopped red cabbage (I left this out)
1 medium carrot, shredded
1 cup shredded Monterey Jack cheese
1 large tomato, chopped
1 1/2 cups chopped cooked chicken, tossed with BBQ sauce
3 tablespoons green onions, chopped
3 tablespoons fresh cilantro, chopped
1 cup crumbled tortilla chips/strips
1 cup bottled ranch dressing
2-3 tablespoons bottled BBQ sauce, to taste
Fill a salad bowl with a mixture of chopped lettuces. Place the beans, corn, cabbage, carrots, cheese, and tomato in sections on top of the lettuce. Pile the chicken in the center. Sprinkle with green onions, cilantro and tortilla chips.
Combine the ranch dressing and BBQ sauce. Toss with the salad and serve.
Jumat, 27 Desember 2013
Senin, 23 Desember 2013
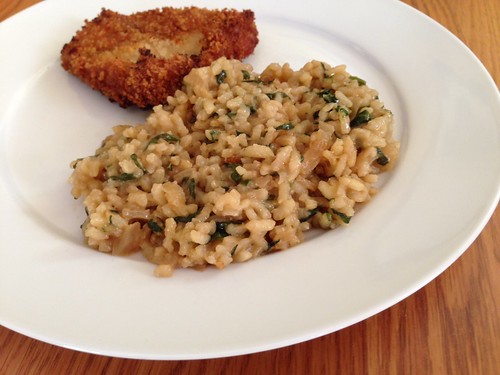
Risotto with Caramelized Onions and Spinach
We were all so enamored with Leek and Pea Risotto I made for the last recipe swap, so when I had a bag of baby spinach in the fridge that needed to be used up I immediately thought of risotto. Not surprisingly, Mary Ellen had a few spinach risotto recipes on her blog. Since I love caramelized onions I decided to make her Risotto with Caramelized Onions and Spinach.
SP couldn't believe that the only seasonings in the dish were the salt and pepper I used for the onions. There is just so much flavor from caramelizing them and the taste really shown through. He couldn't stop raving about it and is now a true risotto convert.
Risotto with Caramelized Onions and Spinach
As seen on Mary Ellen's Cooking Creations
2 tablespoons olive oil, divided
3 tablespoons butter, divided
1 large onion sliced into thin rings
Salt and pepper to taste
1 1/4 cups arborio rice
1/4 cup dry white wine
6 cups low sodium chicken broth, warmed
1 6-oz bag baby spinach, chopped
1/2 cup grated Parmesan cheese
Heat 1 tablespoon each of the oil and butter in a large pan over medium heat. Stir the onions often so they brown slowly. This can take 30-40 minutes. Adjust the heat as necessary to keep the onions from burning. I had to add a little water to the pan to keep the onions from burning and that helped pick up the browned bits from the bottom of the pan. Remove the onions from the pan and allow to cool before chopping into small pieces.
Add the other 1 tablespoon of oil to the pan. Add the rice and stir for 1-2 minutes. Add the white wine and stir until it is absorbed.
Start adding the chicken broth one ladle-full at a time, letting it fully absorb before adding more. This process takes anywhere from 17-25 minutes.
Before you add the final ladle of broth, add the caramelized onions and spinach. Taste some of the rice to make sure it's cooked through. Turn off the heat and add the grated cheese and 2 tablespoons of butter.
Minggu, 22 Desember 2013
Sponsored Post: Campbell's Dinner Sauces, Holiday Version
This is a sponsored post. All opinions are my own.
The folks over at Campbell's asked me to create another recipe using their Skillet Sauces. This time they were looking for a holiday theme, something I'd serve to my family for Christmas or New Year's. I knew exactly what I wanted to do. I'd had a tough time choosing between the various Skillet Sauces (also available in Marsala, Toasted Sesame, Scampi and Thai Green Curry, which I chose the first time I reviewed these), so I was eager to try another variety.
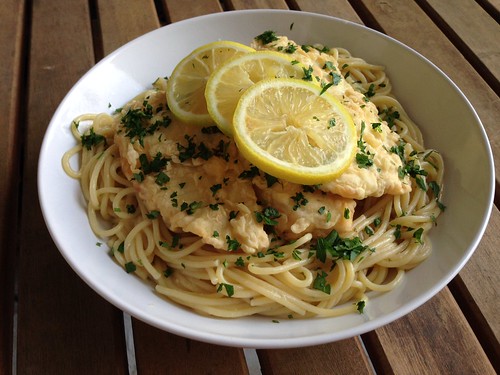
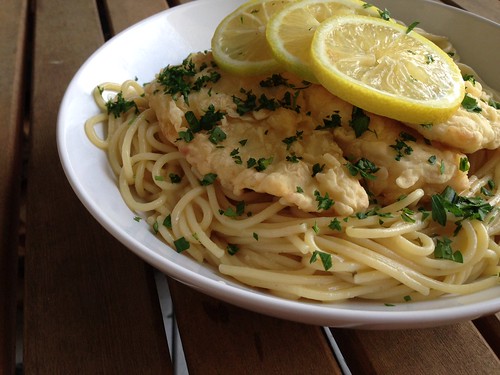
I always serve fish or seafood for Christmas Eve. I happened to have two tilapia filets in the freezer so I chose the scampi sauce. Traditionally scampi is served with shrimp, but I knew the delicate white fish would go well with the white wine and garlic scampi sauce.
This is an incredibly easy dish that comes together in the time it takes to boil the pasta. I coated the fish in egg and flour before shallow frying it in vegetable oil. I drained off the oil and added the sauce to the skillet to heat through, added a squeeze of fresh lemon juice and then tossed the cooked pasta with the sauce. You could also add the fish to the sauce instead, but I wanted to maintain that nice, crispy coating. The meal was on the table in 15 minutes and we all enjoyed this immensely.
You can check out Campbell's Dinner Sauces on their website and on Facebook.
Tilapia Scampi
Makes 2 servings
1/2 cup flour
1 egg
2 tablespoons water
2 pieces tilapia filets
vegetable oil
1 pouch Campbell's Scampi Skillet Sauce
freshly squeezed lemon juice
8oz spagetti, cooked according to package directions
2 tablespoons minced parsley
Place flour in a pie plate. Beat the egg and water in a second pie plate. Gently coat each tilapia filet with flour on both sides, then place in the egg wash, coating on both side, then put back in the flour and coat on both sides.
Add vegetable oil to a large skillet, about 1/2-inch deep. Heat over medium heat. Place tilapia in skillet and cook for about 5 minutes on each side until golden brown. Remove the fish from the skillet and drain off the oil. Wipe the skillet clean. Add the Scampi Skillet Sauce and a squeeze of fresh lemon juice. Toss the cooked pasta with the sauce, then add the fresh parsley.
Divide the pasta between two bowls. Add one tilapia filet to each bowl and serve.
.png)

This post brought to you by Campbell�s Dinner Sauces. Weekend-worthy dinners with only weekday-level effort needed! Learn more at http://www.campbellsauces.com/
The folks over at Campbell's asked me to create another recipe using their Skillet Sauces. This time they were looking for a holiday theme, something I'd serve to my family for Christmas or New Year's. I knew exactly what I wanted to do. I'd had a tough time choosing between the various Skillet Sauces (also available in Marsala, Toasted Sesame, Scampi and Thai Green Curry, which I chose the first time I reviewed these), so I was eager to try another variety.
I always serve fish or seafood for Christmas Eve. I happened to have two tilapia filets in the freezer so I chose the scampi sauce. Traditionally scampi is served with shrimp, but I knew the delicate white fish would go well with the white wine and garlic scampi sauce.
This is an incredibly easy dish that comes together in the time it takes to boil the pasta. I coated the fish in egg and flour before shallow frying it in vegetable oil. I drained off the oil and added the sauce to the skillet to heat through, added a squeeze of fresh lemon juice and then tossed the cooked pasta with the sauce. You could also add the fish to the sauce instead, but I wanted to maintain that nice, crispy coating. The meal was on the table in 15 minutes and we all enjoyed this immensely.
You can check out Campbell's Dinner Sauces on their website and on Facebook.
Tilapia Scampi
Makes 2 servings
1/2 cup flour
1 egg
2 tablespoons water
2 pieces tilapia filets
vegetable oil
1 pouch Campbell's Scampi Skillet Sauce
freshly squeezed lemon juice
8oz spagetti, cooked according to package directions
2 tablespoons minced parsley
Place flour in a pie plate. Beat the egg and water in a second pie plate. Gently coat each tilapia filet with flour on both sides, then place in the egg wash, coating on both side, then put back in the flour and coat on both sides.
Add vegetable oil to a large skillet, about 1/2-inch deep. Heat over medium heat. Place tilapia in skillet and cook for about 5 minutes on each side until golden brown. Remove the fish from the skillet and drain off the oil. Wipe the skillet clean. Add the Scampi Skillet Sauce and a squeeze of fresh lemon juice. Toss the cooked pasta with the sauce, then add the fresh parsley.
Divide the pasta between two bowls. Add one tilapia filet to each bowl and serve.
.png)
This post brought to you by Campbell�s Dinner Sauces. Weekend-worthy dinners with only weekday-level effort needed! Learn more at http://www.campbellsauces.com/
Jumat, 20 Desember 2013
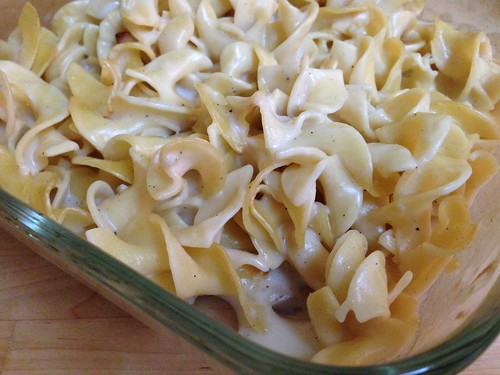
Creamy Noodles
This post has been sitting in my draft folder for ages and I'm sorry it's taken me this long to share it with you.
Awhile back I was looking for an easy side dish, something a little different, and I came across Stephanie's Creamy Noodles. Stephanie is a genius, pure and simple. She took one of my favorite childhood indulgences - those noodles and sauce packets where you just add milk - and made a homemade version.
Unfortunately I didn't have any spinach (not even frozen) when I made these, but they were still delicious. I can't wait to make them again.
Creamy Noodles
As seen on Stephanie Cooks
2 cups egg noodles, uncooked
1 cup baby spinach, cut into thin ribbons
1 cup chicken broth
2 tablespoons flour
2 tablespoons light cream
2 cloves garlic, grated
2 tablespoons Parmesan cheese
1/8 teaspoon salt
1/8 teaspoon onion powder
Pepper to taste
Preheat the oven to 400.
Cook the egg noodles. Drain and put them into a small baking dish. Add the spinach and stir.
In a small bowl combine the chicken broth, flour, light cream, grated garlic, Parmesan cheese, salt, pepper and onion powder. Stir well until the flour is no longer clumpy. Pour the sauce over the noodles and spinach, stirring well.
Bake for about 20-25 minutes, uncovered, stirring halfway through. The broth should thicken up and coat the noodles. Serve.
Rabu, 18 Desember 2013
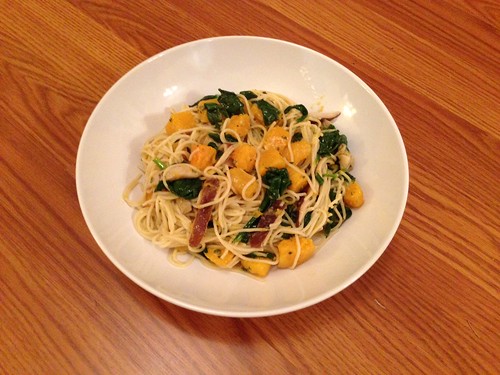
Angel Hair with Butternut Squash, Mushrooms, and Spinach
My supermarket had a coupon for butternut squash recently. I've never cooked with butternut squash (I know, crazy) so I asked the ladies on my cooking board for recipe ideas. Coleen suggested this Pappardelle with Squash, Mushrooms and Spinach. I decided to swap out the pappardelle for angel hair (my current favorite) and hoped the mushrooms would win SP over.
You guys, this was incredible. Simply amazing. For such a simple recipe this really packs and flavor punch. Everything works so well together. And it's a beautiful plate of food with the orange squash, brown mushrooms and green spinach. More fall colors than winter, but I guess it's still technically fall.
I've mentioned before that Baby Girl is a good eater, but she surprised even me with this one. She had three servings. Three.
Angel Hair with Butternut Squash, Mushrooms, and Spinach
As seen on The Redhead Baker, slightly adapted from Bon Appetit
8 ounces angel hair
4 tablespoons unsalted butter, divided
4 tablespoons olive oil, divided
3 cups butternut squash, cut into 1/2" cubes (about one pound)
8 ounces fresh shiitake mushrooms, stems removed and discarded, caps sliced
1 1/2 tablespoons chopped fresh sage (6 to 8 leaves)
6 ounce package baby spinach
3/4 cup grated Parmesan cheese, divided
Cook the pasta in a large pot of boiling salted water. Reserve one cup of cooking liquid from the pasta pot, then drain.
While pasta is cooking, place 2 tablespoons of butter and 2 tablespoons of oil in a large skillet set over medium-high heat. Add the butternut squash to the pan. Season with salt and pepper. Cook, stirring often, about 6 minutes or until the squash starts to soften.
Add the remaining butter and oil to the skillet, then add the mushrooms and the sage. Cook another 6 to 8 minutes, stirring often, until mushrooms soften and the squash is fork-tender.
Add the spinach to the pan and toss until the spinach wilts, about 2 minutes. Stir in 1/2 cup of the Parmesan cheese. Season with salt and pepper.
Add the pasta to the skillet. Toss to coat, adding 1/4-cup of the cooking water at a time to make a sauce.
Divide the pasta and veggies on four plates, and top each with more of the remaining grated Parmesan cheese.
Senin, 16 Desember 2013
Banana Chocolate Chip Muffins
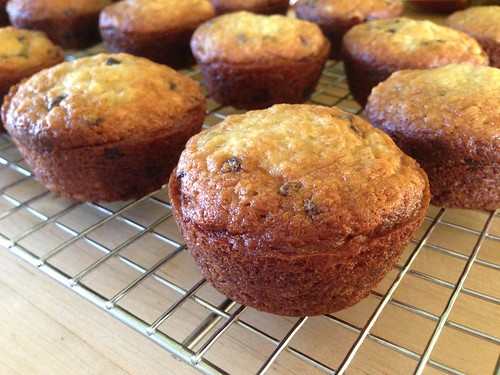
Baby Girl was home with me one day when her school was closed for a teacher in-service. We had bananas ripening on the counter and she'd been watching too much TV while I was working, so we took a baking break. My friend Mary Ellen had recommended these Banana Chocolate Chip Muffins and I couldn't wait to try them.
The ones in this picture are from the second time I made this recipe. The first time (with Baby Girl) I cooked them for 22 minutes and they were very dark and a little more done than I wanted. I have a new oven (and no oven thermometer) and I'm pretty sure the oven runs hot. The second time I made a few substitutions because I didn't have all the ingredients and cooked them for 20 minutes instead and they were perfect. I loved the combo of the sour cream and vanilla yogurt. Definitely use mini chips - they aren't as heavy as a regular chip so they don't sink to the bottom of the batter. There was a nice, even distribution of chips in these.
Baby Girl positively loves these. She asks for one for breakfast every morning and, because she's a bit crazy, she eats them cold straight from the freezer. When I can sneak one away from her, I like to microwave them to get the chill off and then toast them up a bit. I can't wait for more bananas to over ripen so I can make more.
Banana Chocolate Chip Muffins
Slightly modified from Mary Ellen's Cooking Creations
Makes 16 muffins
1 3/4 cups all purpose flour
3/4 cup sugar
1 teaspoon baking powder
1 teaspoon baking soda
1/2 teaspoon salt
1 egg, beaten
1/2 cup vegetable oil
1/4 cup vanilla yogurt
1/4 cup sour cream
1 teaspoon vanilla extract
3 medium-large over ripe bananas, peeled and mashed
3/4 cup semisweet mini chocolate chips
Preheat the oven to 350 degrees.
In a large bowl, combine the flour, sugar, baking powder, baking soda and salt. In another bowl, combine the egg, oil, yogurt, sour cream and vanilla. Stir the wet ingredients into the dry ingredients just until moistened. Fold in the bananas and chocolate chips.
Line muffin cups with paper wrappers or spray with cooking spray. Using an ice cream scoop, fill the cups two-thirds full.
Bake for 20-25 minutes (mine were perfect at 20 minutes) or until a toothpick comes out clean. Cool for 5 minutes before removing muffins from the tins to a cooling rack.
Jumat, 13 Desember 2013
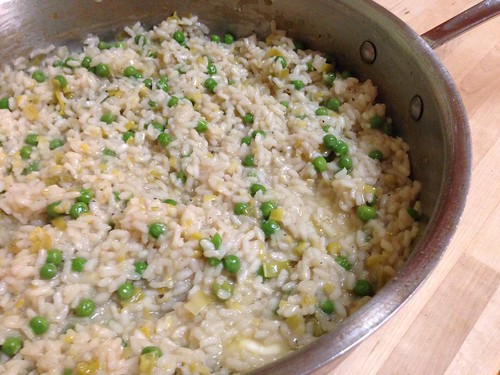
Recipe Swap: Leek and Pea Risotto
Time for another recipe swap! This month's theme was Blogger's Choice, which means we can pick any recipe from our assigned blog. I got my friend Mary Ellen's blog and let me tell you, I had a REALLY hard time picking a recipe to make. I've already made quite a few of her things and I just couldn't narrow down what I wanted to make. Did I want chicken, tofu, vegetarian, breakfast? I had no idea. Everything sounded good. Finally I decided to make a risotto since Mary Ellen has said numerous times that it's her favorite thing to make. I chose this Leek and Pea Risotto because I had some leeks I needed to use up and I always have frozen peas on hand.
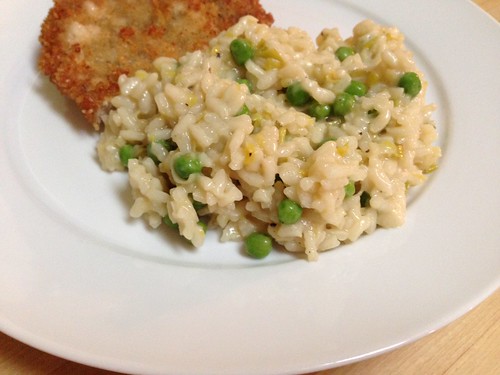
The only change I made was to leave the leeks in the pan while I cooked the rice rather than removing them, which may have been a mistake. SP said he couldn't taste the leeks at all, so maybe they'd have been more pronounced if they hadn't cooked down so much. Even so, this was outstanding. I really love risotto and it's so easy to make. I don't know why it has such a bad reputation for being difficult.
I served the risotto with crispy pork chops - I pounded the pork very thin then breaded it with egg and panko bread crumbs, then shallow-fried them in some vegetable oil. They were the perfect accompaniment. This was an outstanding dinner. I can't wait to make more versions of risotto. Check out Mary Ellen's risotto tab for more recipe ideas.
Leek and Pea Risotto
As seen on Mary Ellen�s Cooking Creations
6 cups chicken broth
3 tablespoons extra-virgin olive oil
2 medium leeks (white and pale green parts only), thinly sliced and washed
1 1/4 cups Arborio rice
1/4 cup dry white wine
1/2 cup frozen peas
2 tablespoons unsalted butter (I didn't use this)
1/3 cup grated Parmigiano-Reggiano
Bring stock to a simmer in a medium saucepan, then keep at a low simmer.
Cook leeks in 2 tablespoons oil in a 4-quart heavy pot over medium heat, stirring occasionally, until softened but not browned, 7 to 8 minutes. Transfer to a plate.
Add remaining tablespoon oil and rice to pot and cook, stirring constantly, until rice is coated evenly, about 1 minute.
Add wine and simmer, stirring, until most has been absorbed, about 1 minute.
Add 1 cup hot stock to the pan. Stir constantly until stock has been absorbed. Continue simmering and adding hot stock, 1 cup at a time, stirring constantly and allowing each addition to be absorbed before adding the next, until 1 cup stock is left, 15 to 18 minutes.
Add peas, leeks, and remaining cup of stock and cook, stirring, until rice is just tender, 3 to 5 minutes.
Stir in butter and cheese then remove from heat.
To check out what the other bloggers chose click the links below:
Kamis, 12 Desember 2013
Sponsored Post: Walkers Shortbread
When I received an email from Walkers Shortbread asking if I'd be willing to partner with them for their holiday blogger program I knew I had to say yes. My family is obsessed with Walkers Shortbread. I mean, what's not to love about the pure, buttery, sugary goodness that is shortbread?
Walkers Shortbread was founded in 1898 and is still a family-owned company. In addition to shortbread, they also make a variety of cookies, cakes, oatcakes and puddings. They export these products to more than 80 countries, but all their products are baked in the villages of Aberlour and Elgin in the Scottish Highlands. Most importantly, there are no artificial flavorings, colorings or additives.
As part of this program I received samples of Shortbread Petticoat Tails, Assorted Shortbreads, Festive Shapes, Mini Stars, Mini Mincemeat Tarts and Stem Ginger Cookies. I brought a few of each to my parent's house for brunch and the five adults sampled the various treats. Unfortunately, Walkers Shortbread says their products aren't suitable for people with nut allergies, which is a real shame because that means Baby Girl couldn't partake.
As part of the holiday blogger program, Walkers is offering my readers 20% off their products (excluding sale items). Just enter promo code #THCHOLIDAY on the Walkers website. The code expires December 19, 2013.
Visit Walkers on Facebook and Pinterest.
Disclaimer: I received free samples of Walkers Shortbread. I was not paid to write this review and all opinions are my own.
Rabu, 11 Desember 2013
Roasted Carrots
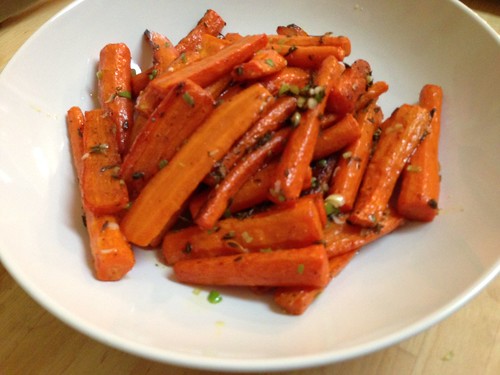
I feel like I'm in a vegetable rut. I always make the same things over and over again. I've never been a huge fan of carrots but I do like them roasted. In the interest of changing up our routine I went on a hunt for an easy recipe to make one night and found these Roasted Carrots.
Simple and delicious. It takes hardly any time at all to prepare these and then the oven does all the work.
Roasted Carrots
Recipe from Pastor Ryan
3 lbs carrots, peeled
1/4 cup olive oil
2 teaspoons fresh thyme
salt and pepper, to taste
4 scallions, minced
Preheat the oven to 400 degrees.
If the carrots aren't all the same size, cut them down the middle lengthwise into same-size pieces. Lay them on a sheet pan or in a baking dish and drizzle with olive oil. Sprinkle with the fresh thyme, salt and pepper.
Bake for 35-40 minutes until they're soft. Sprinkle with chopped scallions and serve.
Senin, 09 Desember 2013
Homemade Pumpkin Ravioli
A few months ago we did an Italian-themed dinner with friends. Whenever we go to C&T's house T and I will make something together from scratch and then split up the rest of the meal. She had printed out this recipe for pumpkin ravioli with brown butter sauce and pecans, so we used that to make the filling and the pasta. Since Baby Girl is allergic to nuts (and because we didn't want a butter-based sauce), I made a sage and garlic-infused cream sauce to serve on top instead.
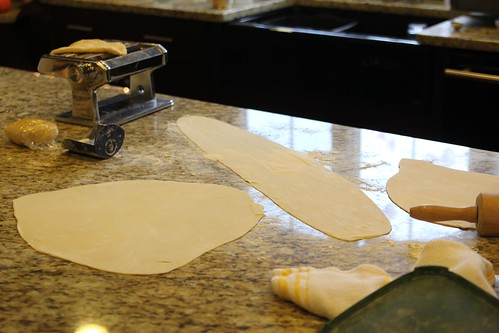
I thought making the dough was going to be very labor-intensive but it was actually incredibly easy. Like, weeknight easy, assuming you have an hour to let the dough rise and a kitchen helper to thread the dough through the pasta roller. It's only 4 ingredients, things most people keep in their pantry and fridge. I was pleasantly surprised.
While the dough was resting I quickly threw together the filling and then we were able to chat until it was time to roll out the dough. Since T didn't have a ravioli mold we just free-formed ours. They came out very rustic, but they still tasted great.
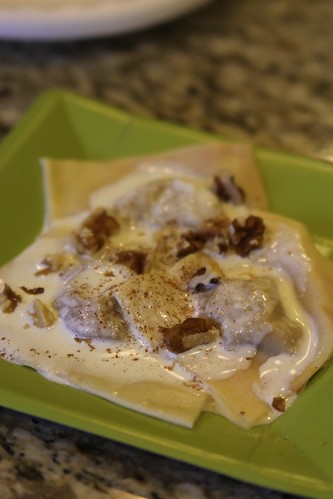
For the final picture, T sprinkled her plate of ravioli with cinnamon and chopped walnuts but the rest of us just ate the ravioli and cream sauce. Delicious.
Pumpkin Ravioli with Sage and Garlic Cream Sauce
Pasta and filling from Julia's Album, sauce A Taste of Home Cooking original
Makes 24 ravioli
Dough:
2 1/2 cups flour
1/2 teaspoon salt
2 eggs
1/2 cup hot water
Filling:
1 15-oz can pumpkin puree
4 tablespoons brown sugar
1/4 teaspoon ground nutmeg
salt and pepper
Sauce:
1 1/2 cups half and half
3-4 sage leaves, minced
3 garlic cloves, crushed
1/4 cup parmesan cheese, grated
To make the dough: mix the flour and salt together in a large bowl. In a small bowl, whisk the eggs and water together. Add the egg and water to the flour and mix until incorporated. Turn out onto a flour-dusted board or clean counter. Knead the dough until firm. The dough should not be too wet or too sticky - it should only stick to itself, but not to your hands. Add more flour as needed to keep the dough dry. Form the dough into a ball, wrap with plastic wrap and let stand for 1 hour at room temperature.
To make the filling: mix pumpkin puree with brown sugar and nutmeg. Season with salt and pepper.
To assemble the ravioli: unwrap the dough and divide into four equal parts. Flour your working area. Using a pasta roller, roll out each part of the dough very thinly. Make sure to flour the dough and the roller to avoid sticking. If you have a ravioli mold, flour the ravioli mold. After you have rolled the 2 portions of dough very thinly, place one layer of dough on the ravioli mold so that it covers all 12 holes. Place a small portion of ravioli filling into each indentation, making sure not to overfill. The filling should be at the same level or lower as the flat part of the mold. Place the second layer of pasta dough on top of the filled ravioli. Using a rolling pin, roll across the mold and along the edges to separate ravioli. As you roll the pin, it also removes all the air from the ravioli, which is very important. Carefully remove any extra dough hanging off the outside edges of the ravioli mold. Separate the 12 raviolis from one another. Flip ravioli mold to release ravioli. Repeat with the remaining dough to make 24 raviolis.
Bring a large pot of water to boil. Boil ravioli for 5 minutes, drain and set aside. Alternatively, if you�re not cooking them immediately, place them on a baking sheet and put in the freezer. After they are frozen, place them in a plastic bag and keep frozen until needed.
To make sage cream sauce: combine half and half, sage and garlic in a small saucepan. Bring to a boil, stirring often. Boil for 15 minutes. Pour the sauce through a sieve to remove the sage and garlic, or you can use a blender to puree the sage and garlic into the sauce. Stir in the cheese and serve on top of the ravioli.
Jumat, 06 Desember 2013
Chorizo and Egg Breakfast Burritos
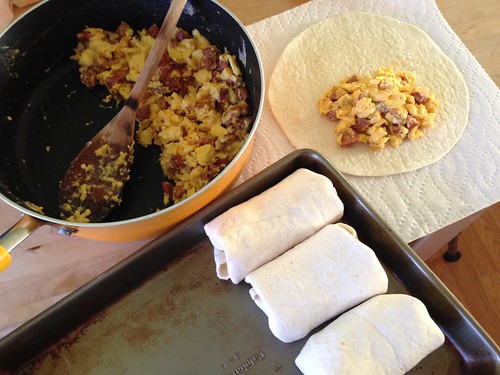
I've had my eye on Melissa's Chorizo and Egg Breakfast Burritos forever. I think the thing keeping me from making them was that she uses fresh, uncooked chorizo and I knew my supermarket only carried the fully cooked variety. In retrospect that seems like a silly reason to put off making them, but there you have it.
One recent Sunday Baby Girl and I spent a few hours together in the kitchen making these burritos and a batch of the sausage and spinach egg bake. I love having these easy breakfasts stored in the freezer for those mornings when I don't feel like cooking eggs (my go-to breakfast item).
Since my chorizo was already cooked I just chopped the links into small pieces and cooked them in the pan for a few minutes to crisp them up a bit. Using fully cooked sausage vs. fresh means there was a less even distribution of chorizo, but I enjoyed the bigger pieces of chorizo when I came across them in my burrito.
As for the recommendation to reheat these on a paper towel - do NOT forget that step. I'm kicking myself for not thinking of the paper towel trick earlier. I've reheated many a soggy breakfast burrito but these are perfect right out of the freezer. I can't wait to try some other fillings.
Chorizo and Egg Breakfast Burritos
As seen on Alosha's Kitchen
8 ounces chorizo
8 eggs, beaten
1/2 cup shredded cheddar cheese
8 flour tortillas (large taco or fajitas size)
Heat a large skillet over medium heat. Add the chorizo and let it sizzle for about 5 minutes or until cooked through (my homemade version releases quite a bit of liquid, but it all cooks up in the end).
Push the chorizo to one side of the pan and pour in the eggs. Let the eggs sit for a few minutes, then stir to combine with chorizo. Continue to stir together until eggs are completely cooked. Remove from the heat and top with the cheese.
Set up the egg pan next to your stack of tortillas.
Divide the chorizo and egg mixture into 8 sections. Place 1/8 on the bottom half of one tortilla. Fold one vertical side in, then the other, then roll and tuck in the sides. Place seam-side down on a baking sheet or plate. Repeat with until all the mixture and tortillas have been used.
Wrap each burrito in plastic wrap and store them in a Ziploc freezer bag.
To reheat, place a frozen burrito on a paper towel and microwave on high for 1 minute. Test to see if it's done, adding another 30 seconds if needed. Cook time will depend on your microwave's power.
Rabu, 04 Desember 2013
November Re-Make Recap
I messed up. I usually finish this recipe recap at the end of each month but we were away for the Thanksgiving holiday and I completely forgot. So, here it is, a few days late. Can we talk about how it's already December? How did THAT happen? I can't believe we're less than a month away from 2014. Anyone else feel like they just start getting used to the current year and it's time to move to the next year? 2013 went by in the blink of an eye.
I rediscovered fish last month and couldn't wait to remake this favorite, tilapia francese. It was just as delicious as I remembered and Baby Girl yummed it up.
We went to our friend's house for an Italian-themed dinner. I had to bring this amazing antipasto salad. This is my go-to salad for anything Italian and it was a big hit.
I finally bought ground ginger so I needed to remake these double crunch honey garlic pork chops. The result was perfect - nice and crunchy coating, delicious sauce. It's been awhile since I cooked pork and we all enjoyed it.
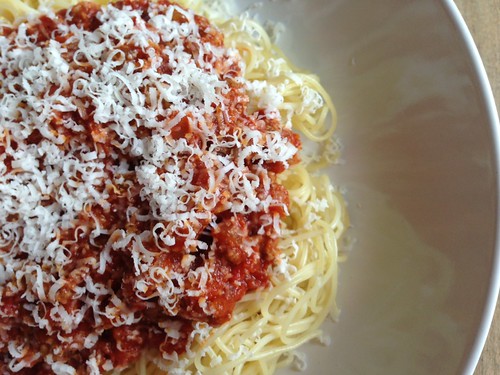
I took more of the meat sauce bolognese out of the freezer. I think I only have two more packages left. Guess that means I'll be making another big batch soon. Such a great freezer meal.
I'm not a big soup person but it was cold and I needed something easy I could make during the day for SP and Baby Girl to eat for dinner. This broccoli cheddar soup hit the spot and the leftovers were great the next day.
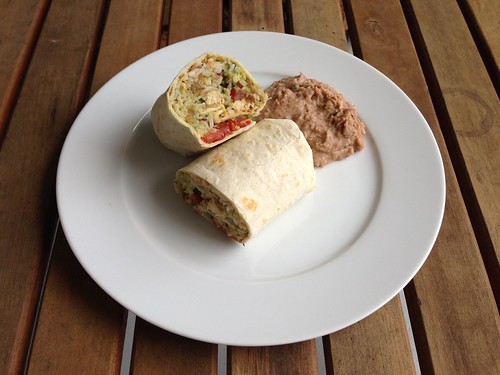
I'm obsessed with these citrus chicken burritos. I'd make them once a week if they weren't so time-consuming. I'm not ashamed to admit that I could eat two of these in one sitting, if given the opportunity.
You know I have to make these refried beans any time I make Mexican food. So simple and so delicious.
I wanted a hearty casserole one night so I made these scalloped potatoes with ham. I'm not sure what happened but my dish was very watery. I think it may have been the onions. I'm going to modify the recipe because I'd hate for that to happen to someone else.
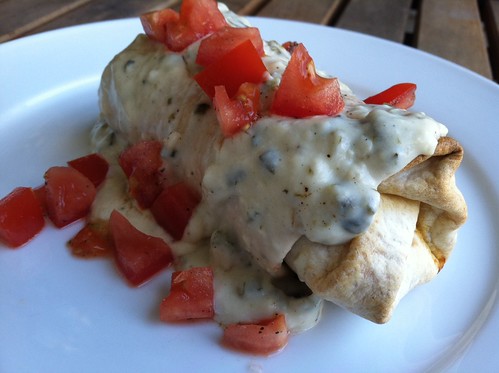
These baked chicken burritos with sour cream-poblano sauce are a family favorite. The original recipe calls for ground beef so that's what I used this time. The sauce is my favorite part of this meal, it's practically drinkable.
Even though asparagus isn't in season (and is very expensive right now) I had to make this spicy pork and asparagus stir fry when a craving hit. Unfortunately I was out of angel hair and didn't realize it, so I couldn't have my leftovers that way. Bummer.
We all love a good, hearty dinner salad and this chicken BLT salad really hits the spot. The crispy chicken is so good.
Senin, 02 Desember 2013
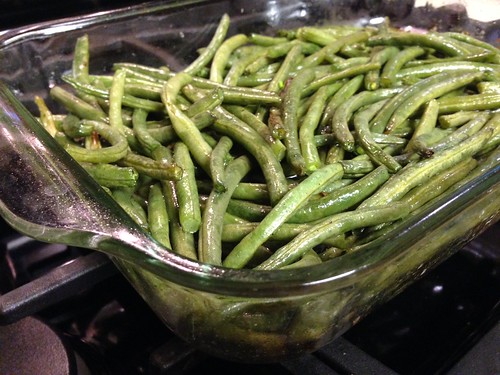
Roasted Green Beans
I love to roast vegetables but I never thought to roast green beans until the girls on my cooking board mentioned it. And it couldn't be simpler - toss with seasonings and oil and roast until tender.
There are a ton of variations - my cooking board mentioned adding onions or mushrooms, garlic, various spices, even soy sauce and orange juice for an Asian spin - but so far I've only done oil, salt and pepper. I'll definitely be experimenting soon, though.
Recently I roasted 2lbs of green beans for 5 adults and 1 child and we had very few leftover. They're so addicting we kept going back for more.
Roasted Green Beans
2lbs green beans
2 tablespoons olive oil
salt and pepper
Preheat the oven to 425 degrees.
Trim the ends off the green beans and place in a 9 x 13" baking dish. Add the oil and season with salt and pepper. Toss to coat all the beans evenly.
Bake for 10-15 minutes or until the beans are tender and starting to brown in spots. Every few minutes give them a toss with tongs.
Rabu, 27 November 2013
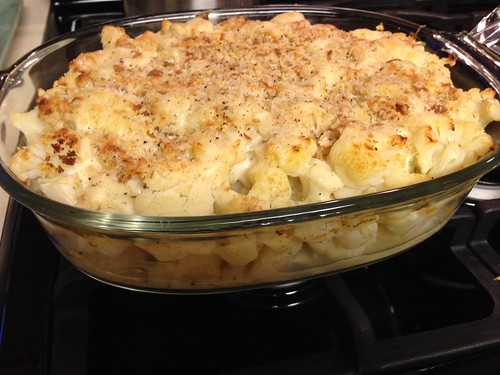
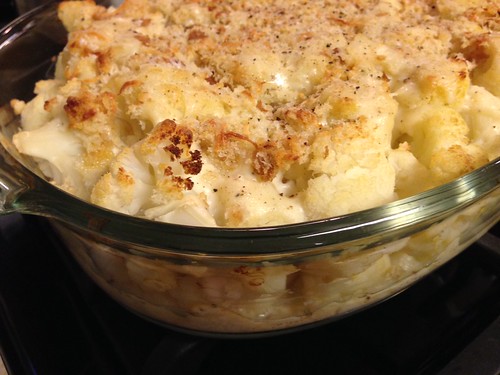
Cauliflower Gratin
This was one of two side dishes I served with the turkey meatloaf - Ina's Cauliflower Gratin. Cauliflower isn't a vegetable I cook with regularly, but it's a great alternative to broccoli or other cold-weather vegetables. And bonus, SP and Baby Girl both love it.
When I think of gratins I think of heavy, cream-laden dishes but this was surprisingly light. The sauce is made with milk, not cream, and there's only 4 tablespoons of butter for a 3-lb head of cauliflower.
We all loved this. I can't wait to experiment with more cauliflower dishes this winter.
Cauliflower Gratin
Recipe from Ina Garten
1 (3-pound) head cauliflower, cut into large florets
Kosher salt
4 tablespoons (1/2 stick) unsalted butter, divided
3 tablespoons all-purpose flour
2 cups milk
1/2 teaspoon freshly ground black pepper
1/4 teaspoon grated nutmeg
3/4 cup freshly grated Gruyere, divided
1/2 cup freshly grated Parmesan
1/4 cup fresh bread crumbs (from one slice of bread)
Preheat the oven to 375 degrees.
Cook the cauliflower florets in a large pot of boiling salted water for 5 to 6 minutes, until tender but still firm. Drain.
Meanwhile, melt 2 tablespoons of the butter in a medium saucepan over low heat. Add the flour, stirring constantly with a wooden spoon for 2 minutes. Pour the milk into the butter-flour mixture and stir until it comes to a boil. Boil, whisking constantly, for 1 minute, or until thickened. Off the heat, add 1 teaspoon of salt, the pepper, nutmeg, 1/2 cup of the Gruyere, and the Parmesan.
Pour 1/3 of the sauce on the bottom of a 2 1/2-quart baking dish. Place the drained cauliflower on top and then spread the rest of the sauce evenly on top. Combine the bread crumbs with the remaining 1/4 cup of Gruyere and sprinkle on top. Melt the remaining 2 tablespoons of butter and drizzle over the gratin. Sprinkle with salt and pepper.
Bake for 25 to 30 minutes, until the top is browned. Serve hot or at room temperature.
Senin, 25 November 2013
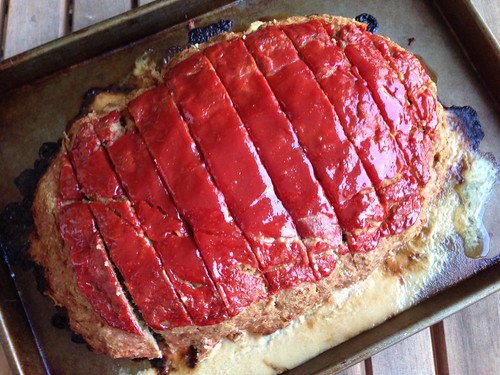
Turkey Meatloaf
I wanted something homey and comforting for Sunday dinner a few weeks back so I turned to an old favorite, Ina Garten's Turkey Meatloaf.
I've made this recipe a bunch of times so I can't believe I never blogged about it. Baby Girl ate a ton of this, more than me actually. We'd cut some up for her and she'd inhale it then ask for more. I made the full 5lbs for 5 adults and 1 child and we had just enough leftover for lunches for four adults, plus a little extra for late-night sandwiches.
Turkey Meatloaf
Recipe from Ina Garten
3 cups chopped yellow onions (2 large onions)
2 tablespoons olive oil
2 teaspoons kosher salt
1 teaspoon freshly ground black pepper
1 teaspoon fresh thyme leaves (1/2 teaspoon dried)
1/3 cup Worcestershire sauce
3/4 cup chicken stock
1 1/2 teaspoons tomato paste
5 pounds ground turkey breast
1 1/2 cups plain dry bread crumbs
3 extra-large eggs, beaten
3/4 cup ketchup
Preheat oven to 325 degrees.
In a medium saute pan, over medium-low heat, cook the onions, olive oil, salt, pepper, and thyme until translucent, but not browned, approximately 15 minutes. Add the Worcestershire sauce, chicken stock, and tomato paste and mix well. Allow to cool to room temperature.
Combine the ground turkey, bread crumbs, eggs, and onion mixture in a large bowl. Mix well and shape into a rectangular loaf on an ungreased sheet pan. Spread the ketchup evenly on top.
Bake for 1 1/2 hours until the internal temperature is 160 degrees. Serve hot, at room temperature or cold in a sandwich.
Jumat, 22 November 2013
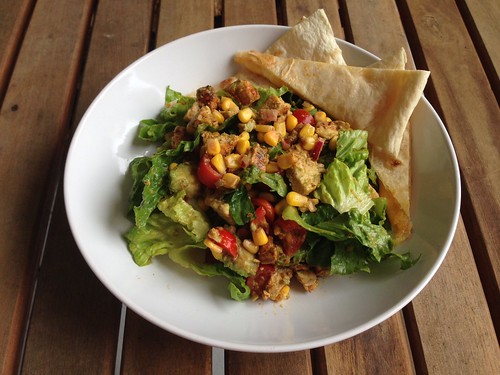
Chopped Chicken Taco Salads with Cheese Quesadilla Strips
It's been awhile since we had a big, hearty salad for dinner. I had this Chopped Chicken Taco Salads with Cheese Quesadilla Strips recipe on my to-make list and I wanted something easy and quick for Halloween night, something that could sit if we had trick-or-treaters at the door.
We all loved this. I was especially in love with the cheese quesadillas, which is funny because they weren't anything extraordinary - just tortillas and cheese - but with the salad they were absolutely perfect. I'll definitely be making this one again and again.
Chopped Chicken Taco Salads with Cheese Quesadilla Strips
As seen on How Sweet It Is
2 teaspoons ground cumin
2 teaspoons smoked paprika
1/2 teaspoon chili powder
1/4 teaspoon salt
1/4 teaspoon pepper
2 boneless, skinless chicken breasts
2 tablespoons olive oil
2 limes, juiced
2 garlic cloves, minced
Cooking spray
2 tortillas
4 ounces monterey jack cheese, freshly grated
2 romaine hearts, chopped
2 avocados, chopped
1 cup sweet corn
1/2 pint grape tomatoes, quartered
1/4 red onion, diced
1/4 teaspoon salt
1/4 teaspoon pepper
1 tablespoon olive olive
1/2 teaspoon red wine vinegar
1 lime, juiced
Combine the cumin, paprika, chili powder, salt and pepper in a bowl. Add the olive oil, lime juice and garlic. Mix thoroughly. Place the chicken in a large plastic food storage bag. Add the seasonings and coat the chicken evenly, then marinate in the fridge for 2-24 hours.
Heat a large skillet or grill pan over medium-heat heat. Cook the chicken for 5 minutes on one side, then flip and cook for another 4 minutes. Let cool for a few minutes and then cut into chunks.
While the chicken is cooling, add a tortilla to a large skillet coated with cooking spray. Brown on one side, then flip and add the grated cheese and the second tortilla on top. Cook until both sides are golden and cheese is melted, then remove from the skillet and slice into strips or triangles.
Combine the lettuce, tomatoes, avocado, corn and onion in a large bowl, then toss with the salt and pepper. Add olive oil, red wine vinegar and lime juice, tossing well to coat. Add in chicken and toss well, then separate into bowls. Add the quesadilla slices and serve.
Rabu, 20 November 2013
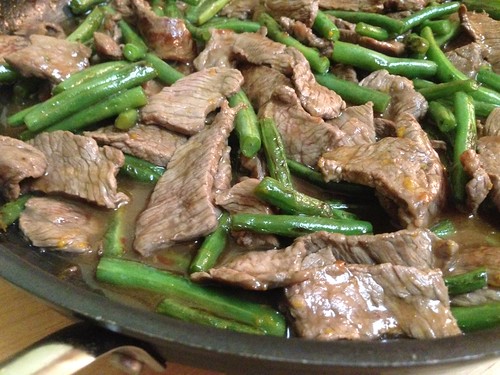
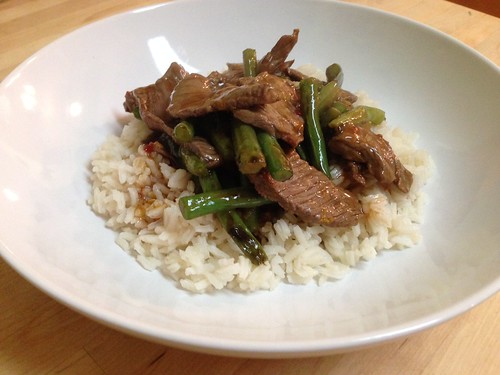
Chinese Orange Beef Stir-Fry
I'm a huge fan of Chinese food but with Baby Girl's nut allergy it isn't something we can indulge in often. That's where make-at-home versions of our favorite dishes come into play. While I've never ordered Orange Beef Stir-Fry at a restaurant, Amy's picture was so drool-inducing I couldn't wait to make it.
The flavors in this dish were so bright - the powerful citrus punch, the salty soy sauce and the heat from the chile garlic sauce all came together beautifully. It took all my will power not to eat two servings at dinner that night. And Baby Girl positively loved this, making all kinds of yummy noises and asking for more beef.
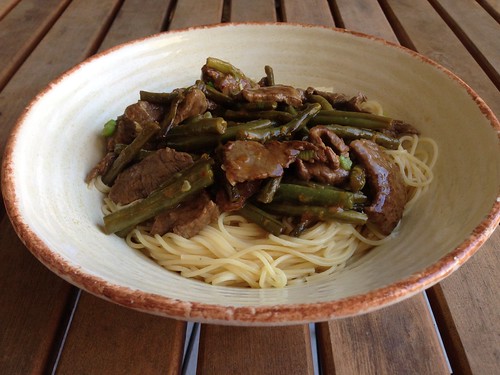
The next day I took my leftovers and served it over angel hair pasta, which is my new favorite way of eating Chinese food leftovers.
The best part about this dish is once you get everything prepped (and there really isn't much to prep) the whole dish takes less than 10 minutes to cook. The rice takes longer than that. Such a quick and easy weeknight meal.
Chinese Orange Beef
As seen on Very Culinary, adapted from America�s Test Kitchen
Zest from a small orange
1/2 cup orange juice
1/4 cup brown sugar
2 tablespoons rice vinegar
2 tablespoons soy sauce (low-sodium or gluten free)
2 teaspoons chili garlic sauce
2 teaspoons grated fresh ginger
2 teaspoons cornstarch
2 teaspoons vegetable oil
1 pound fresh green beans, ends cut, trimmed into 2-inch pieces
1 1/2 pounds sirloin, sliced thinly then into 2-inch wide pieces
2 scallions, chopped
In a medium bowl, whisk together the orange zest, orange juice, brown sugar, vinegar, soy sauce, chili garlic sauce, ginger and cornstarch.
In a large nonstick skillet, heat the oil over medium-high heat. Add the green beans and stir for about 4-5 minutes until crisp-tender and brown in some spots. With a slotted spoon, transfer them to a large bowl. Pat the sirloin dry with paper towels; add to the pan, spreading the pieces out in an even layer. Cook, without stirring, for 1 minute. Toss and transfer to the bowl with the green beans.
Whisk the orange juice mixture then add it to the pan. Cook, scraping up any brown bits, until thickened, about 2 minutes. Add sirloin and green beans back to the pan, along with any accumulated juices. Add the scallions; toss to coat.
Serve over rice or pasta.
Senin, 18 November 2013
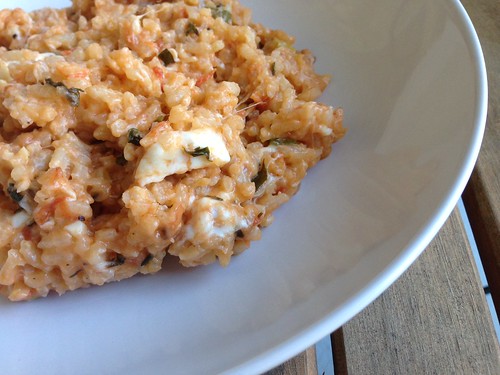
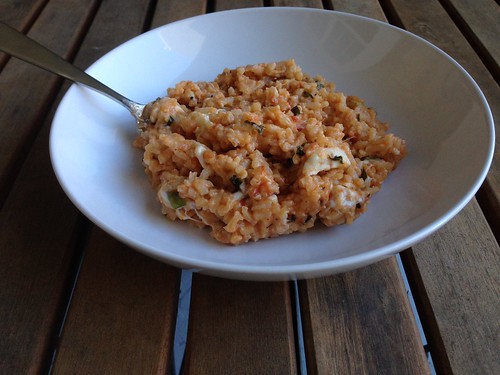
Tomato and Mozzarella Risotto
SP and I have been alternating cooking Sunday dinner for my parents. He tends to lean towards Italian dishes but even so, I was pretty surprised when he told me he wanted to make Tomato and Mozzarella Risotto. He's made it clear to me in the past that he isn't a fan of one of my all-time favorite dishes. Apparently I was just putting too many "weird" ingredients in my risottos of the past. Who knew?
This was truly outstanding. SP did a great job cooking the rice to perfection. He used some of the tomatoes my mom and I canned over the summer instead of the cherry tomatoes in the original recipe, as well as some of the fresh basil I froze when my basil plant was thriving. It was great to throw in those cubes of basil leaves and smell that summery aroma.
He made one and a half recipes (rather than doubling the recipe) for 4 adults and 1 child and there was barely enough leftover for lunches the next day. And that was with salad and bread on the side. It's just so good we all kept going back for more.
Tomato and Mozzarella Risotto
Recipe from Lidia Bastianich
4 1/2 cups hot chicken broth
5 tablespoons extra-virgin olive oil
2 garlic cloves, sliced
2 cups cherry tomatoes, halved
1/2 cup fresh basil leaves
1 medium onion, minced, (about 3/4 cup)
1 medium leek, white parts only, trimmed, cleaned, and chopped
6 scallions , trimmed, white and green parts chopped separately
2 cups arborio rice
1/3 cup dry white wine
salt and freshly ground black pepper
1 1/2 cups fresh mozzarella
1/3 cup Parmigiano-Reggiano, freshly grated
2 tablespoons unsalted butter, cut into 4 pieces
Pour the stock into a 2 quart saucepan and keep it hot over low heat.
Heat 2 tablespoons extra virgin olive oil in a wide skillet over medium heat. Add 2 cloves garlic, sliced, and shake the pan until the garlic is lightly browned. Slide in 2 cups halved cherry tomatoes and stir gently until they are juicy. Toss in a handful of shredded fresh basil, remove the pan from the heat, and set aside.
Heat the remaining olive oil in a wide 3 to 4-quart Dutch oven over medium heat. Stir in the onion and cook, stirring occasionally, until softened, about 4 minutes. Stir in the leek and white parts of the scallions and cook, stirring, until the onion is golden, about 6 minutes. Adjust the heat under the pan as the onion browns so that it cooks slowly with gentle bubbling.
Stir in the rice and continue stirring until the grains are coated with oil and toasted, the edges become translucent, about 1 to 2 minutes. Pour in the wine and let it boil, stirring the rice, until evaporated.
Season the rice with salt and ladle enough of the hot stock into the pan to barely cover the rice. Bring to a boil, then lower the heat so the stock is at a lively simmer. Cook, stirring constantly, until all the stock has been absorbed and you can see the bottom of the pan when you stir. Continue cooking, pouring in the remaining hot stock in small batches - each additional should be just enough to completely moisten the rice - and cook until each batch of stock had been absorbed. Stir constantly until the rice mixture is creamy but al dente, this will take 16 to 20 minutes from the time the wine was added. Stir in the sauteed cherry tomatoes halfway through cooking.
Remove the pan from the heat. Stir in half the grated cheese, taste the risotto, and add salt, if necessary, and pepper. Stir in 1 1/2 cups of cubed fresh mozzarella (preferably mozzarella di bufala) along with the grated cheese and butter. Stir in butter and green parts of the scallion until the butter is completely melted.
Ladle risotto into warm, shallow bowls and serve immediately after finishing.
Jumat, 15 November 2013
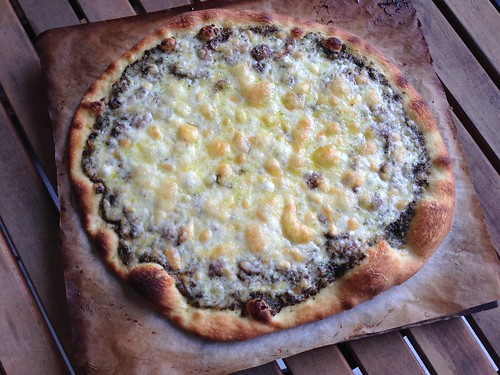
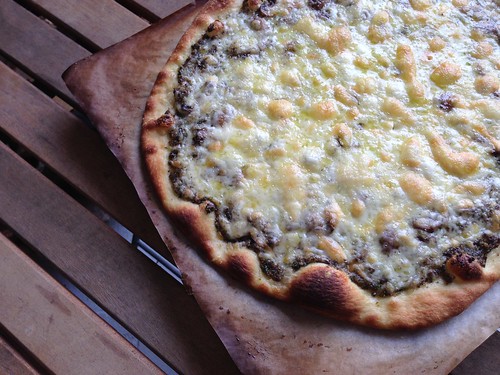
Recipe Swap: Fontina Mushroom Pizza
A mushroom walks into a bar looking dejected. The bartender asks what's wrong and the mushroom says "I don't know why but I just can't get a date." The bartender looks at him and says "I don't know why, you look like a fun guy."
Fun guy. Fungi. Get it?
I'll be here all week.
The recipe swap ladies from my cooking board recently suggested changing the way we do the swaps. Rather than assigning them a recipe to make, they pick a recipe that fits the theme from an assigned blog. This month's theme was vegetarian and I was given Dawn's blog, Simple Gourmet Cook. As soon as I saw this recipe for Fontina Mushroom Pizza I knew I had to make it. SP is a huge mushroom fan and this finally gave me the push I needed to get some more pizza dough in the freezer.
This was a very labor-intensive pizza to make since I had to roast some of the mushrooms, saute the rest, make the pesto, etc. But it was worth it. Baby Girl helped, which usually involves her batting her eyelashes and making innocent faces at me as she steals pieces of whatever ingredient I'm prepping.
I think next time I'd do half fontina and half mozzarella - I found the fontina to be a bit overwhelming - but otherwise this was a great pizza.
Fontina Mushroom Pizza
Simple Gourmet Cooking, adapted from Annie's Eats, as seen on Pink Parsley
For the mushroom pesto:
6 ounces baby bella mushrooms, sliced
1/4 cup extra-virgin olive oil, divided
Salt and pepper
2 cloves garlic, unpeeled
1 small shallot, roughly chopped
2 teaspoons fresh thyme leaves
2 tablespoons fresh parsley leaves
2 tablespoons grated Parmesan cheese
For the pizza:
8 ounces sliced mushrooms
1 tablespoon butter
2 cloves garlic, minced
1 teaspoon minced fresh thyme
Salt and pepper
1 ball pizza dough
Olive oil
1 1/2 cups shredded Fontina cheese
1/2 cup shredded Parmesan cheese
Preheat the oven to 450�. Spread the mushrooms in a single layer on a baking sheet lined with foil. Toss the mushrooms with 1 tablespoon of olive oil and season with salt and pepper. Roast, stirring occasionally, until browned and crisp, about 20-25 minutes. After 15 minutes of baking, add the garlic cloves to the pan.
In the bowl of a food processor or blender, combine the roasted mushrooms, peeled garlic cloves, shallot, thyme, parsley, and remaining 3 tablespoons olive oil. Process until smooth, scraping down the bowl and adding small amounts of water (1 tablespoon at a time) as needed. Transfer pesto to a small bowl, stir in the Parmesan, and set aside.
Turn the oven up to 550� and preheat a pizza stone.
Meanwhile, melt the butter in a skillet over medium heat. Saute the mushrooms until browned and soft, about 6-8 minutes. Stir in the garlic and thyme and cook until fragrant. Season with salt and pepper. Remove from the heat.
Roll out the pizza dough into a 12-14 inch round. Lightly brush the outer edges of the dough with olive oil. Spread the mushroom pesto over the crust in an even layer, leaving about 1/2 inch around the sides for a crust. Add the sauteed mushrooms on top. Top with the fontina and Parmesan.
Carefully transfer the pizza to the preheated pizza stone and bake until the cheese is melted and bubbling and the crust is lightly browned, about 10-12 minutes. Remove from the oven and allow to cool for about 5-10 minutes.
To see what other vegetarian recipes were made in the swap click the links below.
Rabu, 13 November 2013
Product Review: East Riding Farm�s All Natural Popovers
Over the summer I received some frozen popovers from East Riding Farm. I absolutely love popovers, which are a light and flaky roll, and make them every year for Christmas dinner.
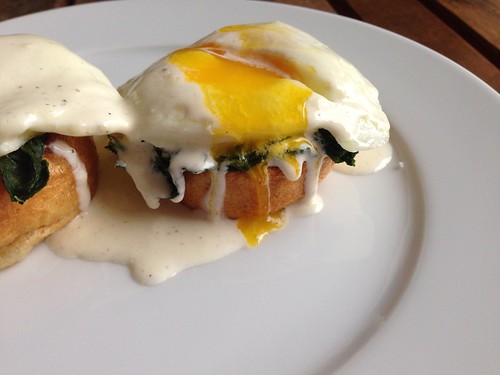
One morning I was standing in front of the fridge trying to decide what to make for breakfast when I thought about the popovers again. I knew I had eggs, spinach and leftover Alfredo sauce and decided to make a spinoff of Eggs Benedict using the popovers as the base, topped with the spinach (I also used sliced tomato once), fried eggs and drizzled with the Alfredo sauce. I wasn't sure how it would turn out the first time but it was outstanding. The light and flaky popovers cook in just four minutes in a preheated oven (I used my toaster oven), which is just enough time to cook the eggs.
You can definitely serve the popovers by themselves as a side, but I loved topping them in this way. I can't wait to try some other variations.
Popovers with Eggs, Spinach and Alfredo
Makes one serving
2 standard-size frozen East Riding Farm popovers
1/4 cup frozen spinach
1/2 tablespoon butter
2 eggs
Alfredo sauce
Cook the popovers in a preheated oven according to package directions.
Microwave the spinach until hot. Wring dry in a clean kitchen towel.
Heat butter in a small non-stick skillet over medium-low heat until melted. Crack the eggs into the skillet and cook to desired doneness.
Heat the Alfredo sauce.
Place the popovers on a plate. Fill each cavity with half the spinach, then top each with one egg and some of the Alfredo sauce. Serve immediately.
Disclaimer: I received free samples of East Riding Farm�s All Natural Popovers. I was not paid to write this review and all opinions are my own.
Senin, 11 November 2013
Roasted Potatoes with Parmesan and Oregano
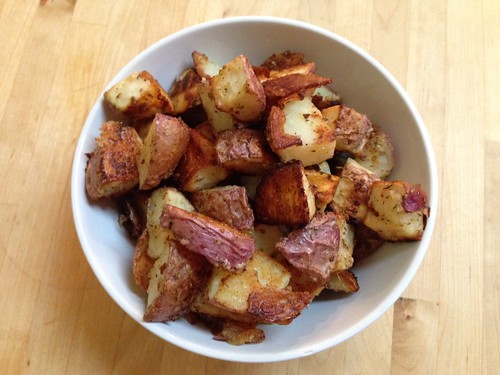
I'm always looking for new side dishes so when Cassie posted these Roasted Potatoes with Parmesan and Oregano I thought I'd give them a try. I haven't really been happy with any roasted potato recipe I've made so I was hoping these would be a winner.
And, they were! The potatoes were crispy on the outside and fluffy on the inside. They also held together wonderfully. I think the red potatoes are key for that since they tend to be a sturdier potato. The oregano and parm flavors really came through and this was so easy to throw together. I cut the recipe in half because we didn't need leftovers, but I bet any leftover potatoes would be great topped with fried eggs for breakfast. Thanks Cassie!
Roasted Potatoes with Parmesan and Oregano
As seen on Cassie Craves
3 pounds baby red potatoes, diced
1 1/2 teaspoons salt
1 teaspoon pepper
1 teaspoon dried oregano
1 teaspoon garlic powder
1/4 cup grated Parmesan cheese
1/4 cup olive oil
Preheat the oven to 475 degrees.
Arrange the potatoes in a single layer on a large baking sheet. Sprinkle with salt, pepper, oregano, garlic powder, and Parmesan cheese. Drizzle with olive oil and use your hands to toss the potatoes with the seasonings.
Bake for 25 to 30 minutes, flipping occasionally, until browned and crispy.
Langganan:
Komentar (Atom)

