Jumat, 13 Juni 2014

Pork Ribs

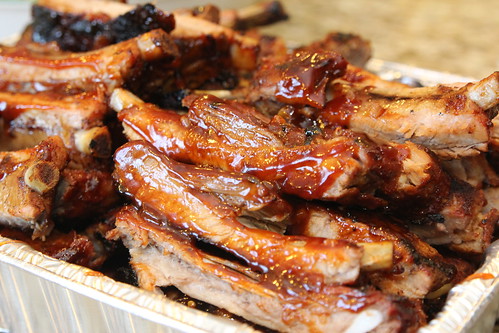
If I had known ribs were this easy to make at home I would have been making them once a week.

We recently had a BBQ-themed dinner with our friends C&T. Among other things, T made four racks of ribs. I probably had half a rack myself and when she asked if we wanted to take some home I jumped at the chance. I knew I had to blog about these because (1) they're so delicious and (2) they're so easy to make.
Untitled
Photo credit - T. Casey

T gave me basic instructions for the ribs and told me she used Pioneer Woman's recipe for BBQ sauce. I can't wait to make these myself this summer. I've also talked her into making another rack or two for our next themed dinner in August.

Pork Ribs

pork rib racks (4 racks will feed an army)
pork rub (T used McCormick Grill Mates pork rub)
BBQ sauce

Preheat the oven to 225 degrees.

Rub the ribs on both sides with some of the pork rub. Lay each rack in a double layer of foil. Add 1/4 cup of water and then seal the foil around the ribs.

Bake for 2 hours.

While the ribs are baking, make the BBQ sauce (recipe below or use your own). Once the ribs are done, remove them from the foil. Spread some of the BBQ sauce on each rack.

Preheat a grill to high. Lay each rack on the grill. You want to leave them alone so they get a nice crust.

Remove the ribs from the grill. Place one rack at a time on a cutting board. Slather with more sauce on both sides. Using a very sharp, long knife, cut the ribs between the bones. Pile on a serving platter and have lots of napkins on hand.

Homemade BBQ Sauce
As seen on Pioneer Woman

1 tablespoon canola oil
2 cloves garlic, minced
1/2 onion, diced
1 cup ketchup
1/3 cup molasses
1/3 cup brown sugar
4 tablespoons minced chipotle peppers in adobo sauce (or a few shakes of red pepper flakes)
4 tablespoons distilled vinegar
1 tablespoon Worcestershire sauce
Dash salt

Heat the oil in a saucepan over medium-low heat. Add the garlic and onions and cook for 5 minutes, stirring, being careful not to burn them. Reduce the heat to low. Add the ketchup, molasses, brown sugar, chipotle peppers or red pepper flakes, vinegar (or less to taste), Worcestershire sauce and salt and stir.

Allow to simmer for 20 minutes. Taste after simmering and add whatever ingredient it needs (more spice, more sugar, etc.).

Yield: 2 cups

Jumat, 06 Juni 2014

Pizza Fridays: Pizza with Ground Pork, Leeks and Rosemary

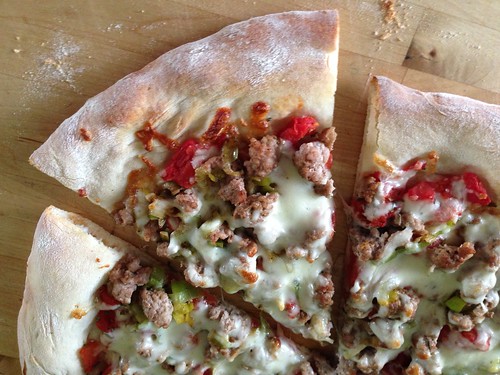
I had 8oz of ground pork in the freezer and absolutely no idea what to do with it. Then Coleen posted this Pizza with Ground Lamb, Leeks and Rosemary and I figured I could sub pork for the lamb.

pizza with pork and leeks

I forgot to season the pork with salt and pepper while it was cooking, but otherwise this was a pretty good pizza. I really enjoyed experimenting with different toppings this winter and I'd definitely make this one again. Now that it's warm I'll be switching to flatbread pizzas or burgers on Fridays since cranking the oven to 550 degrees when it's 90+ outside isn't appealing.

Pizza with Ground Pork, Leeks and Rosemary
Slightly modified from The Reheaded Baker

8 ounces ground pork
salt
freshly ground black pepper
2 tablespoons olive oil, divided
1 leek (white and light green parts only), rinsed, halved and sliced 1/4-inch thick
1 lb pizza dough
1 (14-ounce) can diced tomatoes, drained
Pinch of red pepper flakes
shredded mozzarella
2 stalks fresh rosemary

In a large nonstick skillet, heat 1 tablespoon oil over medium-high heat. Add the ground pork and cook, breaking up clumps with a wooden spoon or spatula, until fully browned. Season with salt and pepper. Remove from the skillet to a paper-towel-lined plate to drain the fat. Wipe out the skillet.

Heat the remaining tablespoon of oil in the same skillet over medium heat; add the leeks and a pinch each of salt and pepper, and cook, stirring frequently, until the leeks are soft, about 8 minutes.

Place a pizza stone in your oven and preheat the oven to 475 degrees.

Season the diced tomatoes with pepper and red pepper flakes. Strip the rosemary leaves off of the stems; discard the stems. Roughly chop the leaves.

Lay a sheet of parchment paper the size of your pizza stone on a work surface. Lightly dust with flour. Roll or stretch the dough into a 12- to 14-inch circle on the parchment paper. Spread the tomatoes in a thin layer over the dough, leaving a half-inch margin around the outer edges. Sprinkle half the mozzarella over the tomatoes, then sprinkle on the chopped rosemary.

Transfer the pizza to the hot pizza stone. Bake for 8-10 minutes, until the cheese is bubbling and the crust starts to appear dry. Partially remove the pizza from the oven, very carefully sprinkle the ground pork and leeks over the pizza, then sprinkle on the remaining half of the mozzarella cheese. Return the pizza to the oven to bake another 2 to 4 minutes, until the top layer of cheese has melted and the crust is golden brown.

Remove the pizza from the oven, let it cool for about 5 minutes before slicing and serving.

Rabu, 04 Juni 2014

Grilled BBQ Chicken Sandwiches with Brown Sugar Grilled Onions

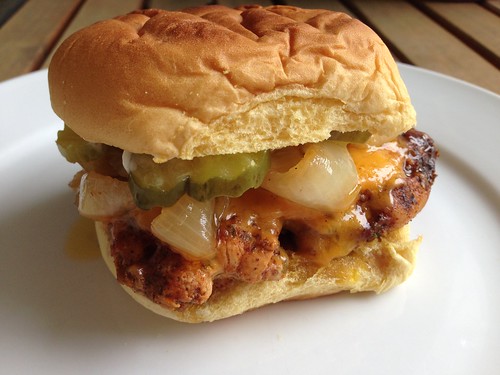
From the moment Cassie posted these Grilled BBQ Chicken Sandwiches with Brown Sugar Grilled Onions on Instagram I fell in love. I hounded her to write up a blog post so I could make them and, happily, she obliged.

BBQ chicken sandwiches

I was finally able to put them on the menu recently and all I can say is wow. These are incredible. Absolutely delicious. The citrus from the orange juice really comes through and I love the tang of the BBQ sauce with the pickles and the sweet onions. Heaven.

The only change I made was to sub the Italian dressing in Cassie's recipe for olive oil and the seasonings that go into the dressing. We don't keep bottled Italian dressing on hand and since I had almost all the spices I needed I figured I'd just make my own marinade.

You have got to try these sandwiches. You won't be sorry. I'm already plotting when I can make them again.

Grilled BBQ Chicken Sandwiches with Brown Sugar Grilled Onions
As seen on Cassie Craves, spice mixture adapted from allrecipes

4 chicken breasts
olive oil
1 teaspoon garlic salt
1 teaspoon onion powder
1 teaspoon white sugar
2 teaspoons dried oregano
1/4 teaspoon ground black pepper
1/4 teaspoon dried basil
1 teaspoon dried parsley
dash of seasoned salt
1 tablespoon Worcestershire sauce
Juice of 1 orange
2 teaspoons chili powder
BBQ sauce

1-2 large sweet Vidalia onions, sliced into thick rings
2 tablespoons olive oil
2 tablespoons brown sugar
1/2 teaspoon salt
1/4 teaspoon freshly-ground black pepper

1 cup shredded cheddar cheese

4 sandwich buns, cut in half
Butter
Sliced pickles
Mayonnaise

In a large food storage bag, combine the oil, seasonings, Worcestershire, orange juice, and chili powder. Add the chicken, close the bag, and toss to combine. Marinate overnight.

Heat grill pan over medium-high heat. Toss together the onion rings, olive oil, brown sugar, and salt and pepper in a bowl. Add the onions and cook until they are tender and charred. Remove to a bowl and cover to keep warm.

Add the chicken to the grill. Cook chicken 5 minutes on one side, brush with BBQ sauce, then flip and cook 4 minutes. Brush the other side with BBQ sauce. With one minute left to cook, top each chicken breast with some of the cheese. Cover the grill pan with foil and let the cheese melt. Remove from the pan.

While the chicken is cooking, butter the cut side of the buns and toast them.

Serve each chicken breast topped with a pile of onions, some more BBQ sauce, pickles and mayonnaise.

Senin, 02 Juni 2014

Banana Cake with Cream Cheese Frosting

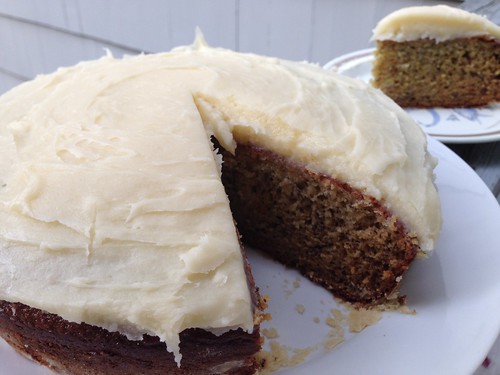
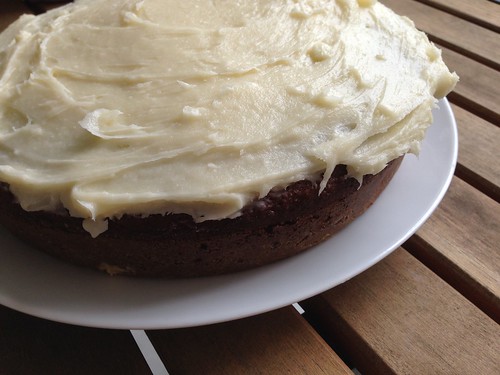
I've mentioned before that SP has been trying to get back into the kitchen. Recently he decided he wanted to use some of our overripe bananas to make this Banana Cake with Cream Cheese Frosting.

Banana cake with cream cheese frosting

He and Baby Girl made this together, which was so cute to watch. Due to her nut allergy we had to leave out the walnuts, but we didn't miss them. Being a chocolate lover, I had hoped SP would be open to adding chocolate chips instead but he wanted the banana to really shine.

Banana cake with cream cheese frosting

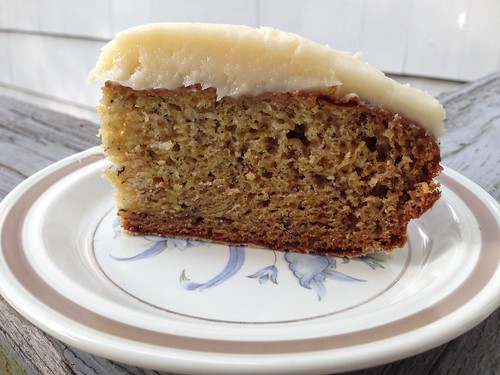
This was excellent. The cake was moist and flavorful and cream cheese icing is pretty darn fantastic. The recipe made a nice, thick layer of it, too. This takes a bit of planning since you need very ripe bananas and the ingredients have to come to room temperature, but otherwise it's very simple.

Banana cake with cream cheese frosting

Banana Cake with Cream Cheese Frosting
Ina Garten, from Barefoot Contessa How Easy is That?

3 very ripe bananas, mashed
3/4 cup granulated sugar
1/2 cup light brown sugar, lightly packed
1/2 cup vegetable oil
2 extra-large eggs, at room temperature
1/2 cup sour cream
1 teaspoon pure vanilla extract
Grated zest of 1 orange
2 cups all-purpose flour
1 teaspoon baking soda
1/2 teaspoon kosher salt
1/2 cup coarsely chopped walnuts (optional)
Cream Cheese Frosting (recipe follows)
Walnut halves, for decorating (optional)

Cream Cheese Frosting:
6 ounces cream cheese, at room temperature
6 tablespoons (3/4 stick) unsalted butter, at room temperature
1 teaspoon pure vanilla extract
2 1/2 cups sifted confectioners' sugar (1/2 pound)

Preheat the oven to 350 degrees. Grease and flour a 9 by 2-inch round cake pan.

In the bowl of an electric mixer fitted with the paddle attachment, mix the bananas, granulated sugar, and brown sugar on low speed until combined. With the mixer still on low, add the oil, eggs, sour cream, vanilla, and orange zest. Mix until smooth.

In a separate bowl, sift together the flour, baking soda, and salt. With the mixer on low, add the dry ingredients and mix just until combined. Stir in the chopped walnuts, if using. Pour the batter into the prepared pan and bake for 45 to 50 minutes, until a toothpick inserted in the center comes out clean. Cool in the pan for 15 minutes, turn out onto a cooling rack, and cool completely.

Spread the frosting thickly on the top of the cake and decorate with walnut halves, if using.
Cream Cheese Frosting:

Mix the cream cheese, butter, and vanilla in the bowl of an electric mixer fitted with the paddle attachment on low speed until just combined. Don't whip! Add the sugar and mix until smooth. Yield: frosting for one 9-inch cake.

Jumat, 30 Mei 2014

May Re-Make Recap

May was a crazy month - we ran our first 5K race of the season, attended our first food truck event, celebrated Mother's Day and Baby Girl started swim lessons. Work has been busy for both of us as well. And now that the weather has changed, we've been trying to spend as much time outside as possible, at least when the weather cooperates. It's been a bit off-kilter lately, with 85 degrees one day and 60 degrees the next.

It was another delicious month in the kitchen. I remade some family favorites and rediscovered a few dishes I've been wanting to remake for awhile.

Untitled

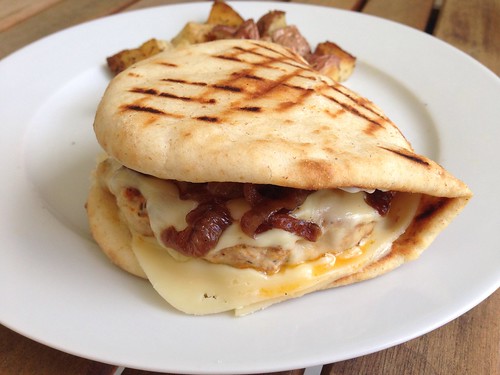
I used the last two 8-oz packages of homemade chorizo to make chicken chorizo patty melts for Sunday dinner. Everyone loved them. This is one of Baby Girl's favorite meals and she was sad to learn that it was the last of the homemade chorizo. If I can find my blender I may make another batch just so we can have these sandwiches again.

Untitled

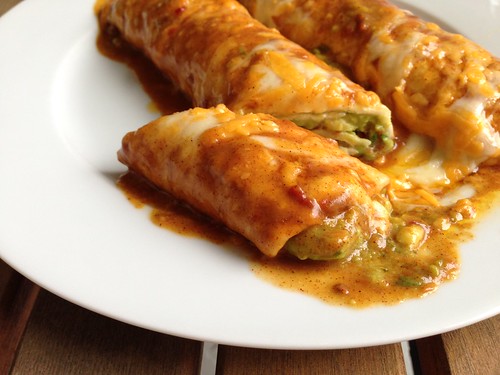
I pulled these avocado enchiladas from way back in the archives. Any time someone would ask for a vegetarian Mexican recipe I'd recommend them, but it had been 5 years since we'd actually eaten them. Just as delicious as I remembered.

Refried beans

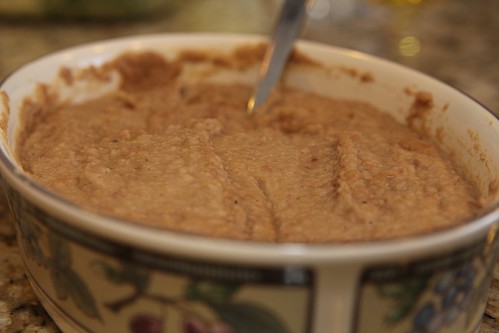
And, of course, we had refried beans on the side.


You all know how much I love these Hawaiian chicken sandwiches, so I was thrilled when Baby Girl requested them for dinner this month. I'm always grateful that she's a good eater but it makes me very proud when she actually asks me to make something specific.

crispy potatoes

And what sandwich would be complete without these roasted potatoes? I could eat these once a week (and sometimes I do).

Springtime pasta

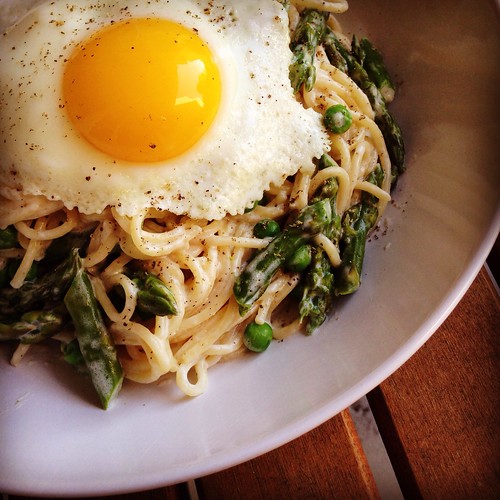
This is another meal Baby Girl asked me to make - linguine with alfredo, asparagus, peas and poached egg. I posted this photo on Instagram because it was just so perfect. Look at that egg contrasting with the asparagus and peas. Gorgeous. This one is always a winner.

Skillet beef stroganoff

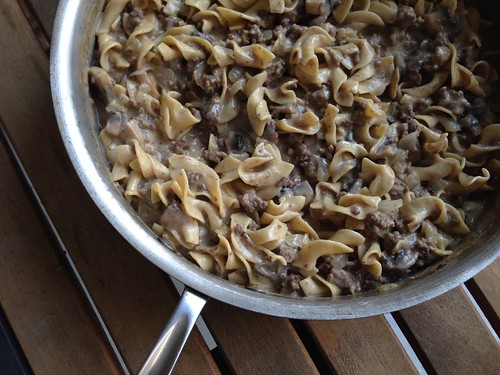
I also decided to do a new post for this skillet beef stroganoff. This is one of my most popular recipes and for good reason - it's a one-pot meal that tastes great every single time.


No recipe recap would be complete with these TRH salads. We went a few weeks without having them and I missed them.

Untitled

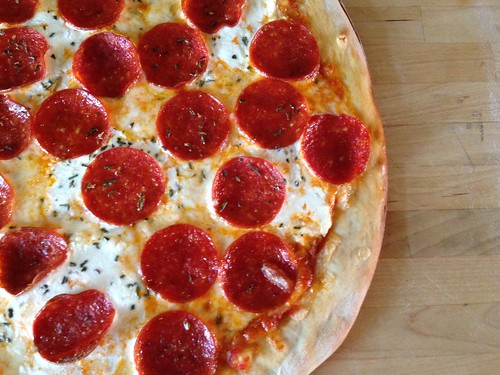
This 3 cheese pepperoni and rosemary pizza is my new favorite pizza. Words cannot adequately describe how delicious it is. I found one more ball of dough in my freezer and this is the pizza I'm going to make with it.


Another old favorite, this mom's helper is a knock-off version of Hamburger Helper that tastes world's better.


After recommending this chipotle honey lime pork tenderloin to some friends and watching them all blog about it I knew I had to remake it. Man, oh man, is this a good one. This time I made a quick chipotle mayo to dip the pork into. Divine, especially when paired with the recipe below.


I feel like the pork tenderloin above goes so beautifully with this mushrooms and corn with cilantro recipe. Maybe it's the shared cilantro, I don't know. All I know is this is phenomenal.

Roast beef panini

We need quick meals on Wednesdays when Baby Girl has swim lessons, and these roast beef and cheddar sandwiches were perfect. I didn't cook them on a panini press this time and they were still great. I prepped everything in advance so all we had to do was assemble and eat.


The day I had this bacon broccoli mac and cheese on the menu I didn't feel like eating pasta so I left it out. The broccoli coated in the cheese sauce mixed with bacon and scallions was delicious.

crispy fish

I can't go too long without making crispy tilapia. I actually made it twice - once as sandwiches and another time as fish sticks. We all loved the fish sticks and couldn't stop eating them.


I brought back an old favorite - cheesy zucchini rice - to serve with the fish sticks. Such a great side dish. This is one of SP's favorites and now that zucchini is in season we'll be having it a few times a month, I'm sure.


Rabu, 28 Mei 2014

Crunchy Baked Tacos

I love tacos but there was always something about them that made me feel like they wouldn't work for a weeknight. I think it was all the prep work for the various toppings, trying not to overfill them at the table and a general dislike of tacos made with soft flour tortillas. Then I saw these Crunchy Baked Tacos from No. 2 Pencil and it was like a light bulb went off in my head. Minimal work and crunchy shells. I was sold.

Crunchy baked tacos

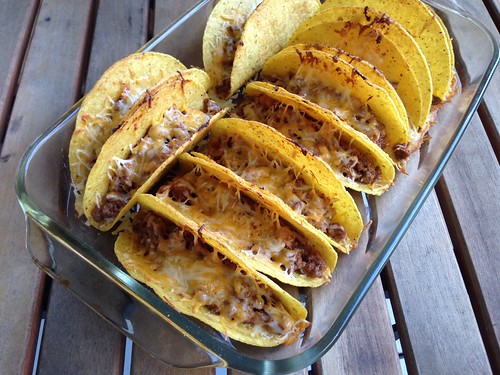
Baking the shells with the meat and cheese already inside was brilliant - I hate when the cheese isn't fully melted and this solves that problem. Plus, you just take a taco from the baking dish and you're ready to eat. I kept the toppings simple - shredded lettuce, diced grape tomatoes and I found an avocado in my crisper so I diced that up, too. Some sour cream at the table and we were set.

Crunchy baked tacos

This is definitely my new favorite taco recipe. I swapped out my filling recipe but kept the method the same. The one thing I didn't like - these don't reheat well the next day. In fact, they were downright awful. My recommendation would be to only make as many as you anticipate eating. The good news is they take hardly any time to cook so you can assemble some more and bake them off quickly if you decide you want a second helping.

Crunchy Baked Tacos
Filling from A Taste of Home Cooking, method from No. 2 Pencil

1 5.8 oz box yellow corn taco shells (12 shells)
1 pound ground beef
1 onion, chopped
1 clove minced garlic
2 teaspoons cumin
2 teaspoons chili powder
Salt and pepper
2 tablespoons tomato paste
1/2 cup salsa
1/4 cup sour cream
2 cups of freshly shredded colby jack cheese
romaine lettuce, shredded
vine-ripened tomatoes, diced
sour cream
taco sauce

Preheat oven to 400 degrees and place shells in a 9x13 baking dish.

Heat a saute pan over medium heat. Add the ground beef and cook, breaking up the large chunks, until just starting to brown. Add the onion and garlic and saute until the onions are soft and the beef is cooked through. Add the cumin, chili powder, salt, pepper and tomato paste. Let cook for about 5 minutes. Off heat, add the salsa and sour cream and stir to incorporate.

Sprinkle half of the cheese in the bottom of each taco shell. Evenly distribute the ground beef in each shell. Top ground beef with remaining shredded cheese.

Bake for 8-10 minutes (mine were done at 8 minutes), or until cheese is melted and shells have started to crisp.

Remove from oven and top with lettuce, tomatoes, sour cream and taco sauce.

Senin, 26 Mei 2014

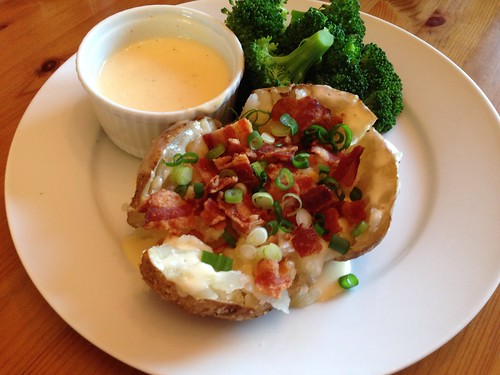
Steakhouse Baked Potatoes

We all love a good baked potato so I wanted to see if I could make it into a meal by adding steamed broccoli, crispy bacon and scallions all smothered in a delicious cheese sauce. These Steakhouse Baked Potatoes weren't quite as filling as I wanted - we like to eat a big dinner most nights - but if you have a late or hearty lunch these would be perfect as a light dinner.

Untitled


Steakhouse Baked Potatoes

4 russet potatoes (about 1/2 pound each)
vegetable or olive oil
kosher salt
2 broccoli crowns, cut into florets
1 tablespoon butter
1 1/2 tablespoons all-purpose flour
1 1/4 cups 2% reduced-fat milk
2 ounces extra-sharp cheddar cheese, shredded (about 1/2 cup packed)
4 slices bacon, cooked and cut into small pieces
4 scallions

Preheat the oven to 350 degrees.

Wash and dry the potatoes and poke each potato all over with a fork (so they won�t explode).

Rub some oil over each potato. Place the potatoes on a baking sheet. Sprinkle salt over the potatoes and roll them around to cover completely.

Bake about 1 hour. Check the potatoes by inserting a fork into the center. It's done when the fork goes in easily.

While the potatoes are cooking, bring a large pot of water to a boil. Season wit salt and then add the broccoli. Cook for 4 minutes, then drain and keep warm. You can also steam the broccoli.

Melt butter in a small saucepan. Sprinkle flour over melted butter; cook for 1 minute, stirring often with a whisk. Gradually add milk to the flour mixture in pan, and bring to a boil, stirring often with a whisk. Cook for 1 minute or until slightly thick, then remove from heat. Add the cheese and stir until smooth.