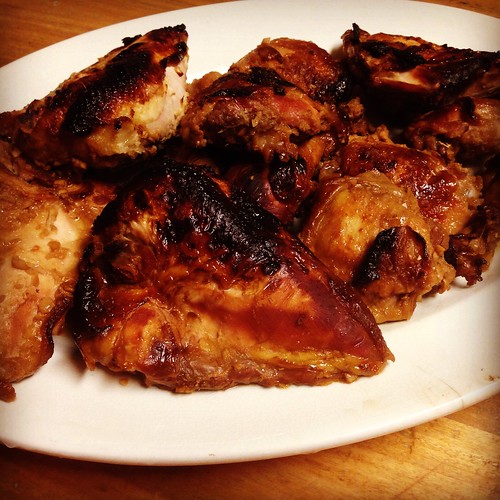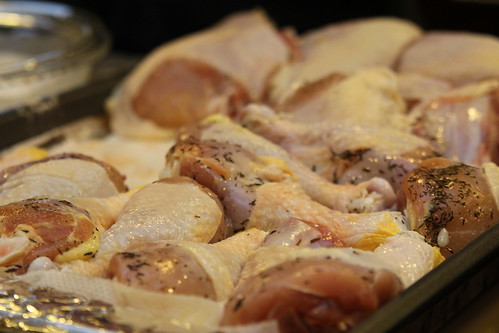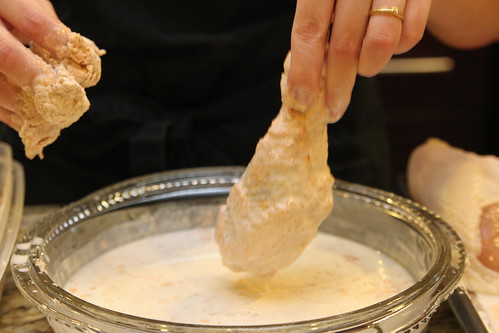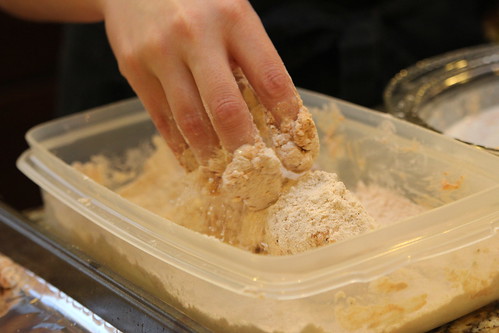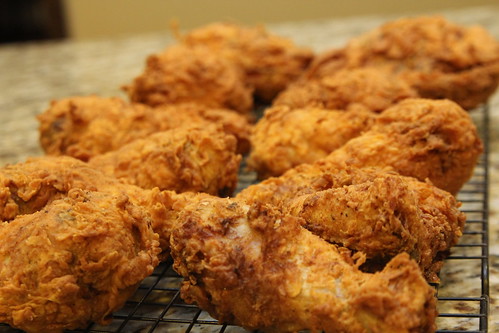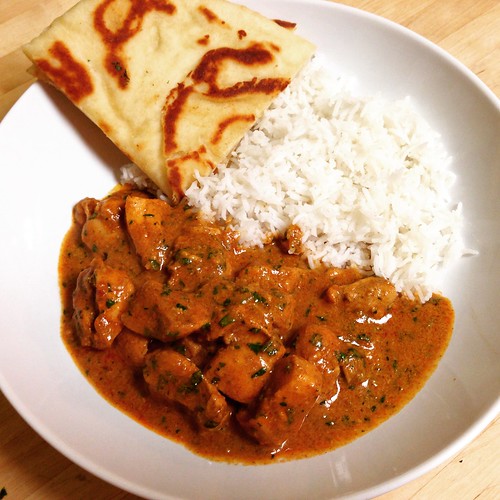
Can we talk about chicken thighs for a minute? I know I'm late to the party but holy moly are they good. Tender, juicy, flavorful, almost impossible to overcook. And cheap as all get-out. I had a serious craving for Chicken Tikka Masala recently and realized I'd never gotten around to trying my friend Melissa's version. This is now my go-to recipe.
It's not that different from the previous version I used to make in terms of ingredients and flavor. The big differences are the use of chicken thighs and the cooking method. Melissa's recipe has you marinating the chicken and then baking it. My old version had you grilling the chicken. Baking is so much easier and clean up is a snap.
This was outstanding. Utterly fantastic. We all gobbled it up, using some delicious buttered naan to soak up the sauce.
Chicken Tikka Masala
As seen on Alosha's Kitchen
Marinade
1 cup plain yogurt
2 tablespoons lemon juice
1 tablespoon grated fresh ginger
2 teaspoons cumin
1 teaspoon ground cinnamon
1 teaspoon ground cayenne pepper
1 teaspoon salt
1 1/2 to 2 pounds boneless, skinless chicken thighs cut into large cubes
Sauce
1 tablespoon butter
2 cloves garlic, minced
1 jalapeno chile, minced
2 teaspoons ground coriander
1 teaspoon cumin
1 teaspoon sweet paprika
1 teaspoon garam masala
1 teaspoon salt
1 8 oz. can tomato sauce
1/2 cup half and half
1 cup water
1/2 cup fresh chopped cilantro
In a large food storage bag, combine yogurt, lemon juice, grated ginger, 2 teaspoons cumin, cinnamon, cayenne and 1 teaspoon salt. Add the chicken, toss to combine, seal the bag and refrigerate overnight.
Preheat the oven to 350. Spread the chicken out on a foil-lined baking sheet and cook for 25 minutes.
While the chicken is cooking, melt the butter in a 12-inch non-stick skillet over medium heat. Add the garlic and jalapeno and stir for 1 minute. Stir in the ground coriander, 1 teaspoon cumin, paprika, garam masala and 1 teaspoon salt. Add the tomato sauce, half and half and water and stir to combine. Reduce the heat to low and simmer gently until the sauce thickens, about 10 minutes.
Add the cooked chicken with all the accumulated juices (don't omit that!) to the sauce and let simmer for another 10 minutes. Garnish with chopped cilantro.
Serve over basmati or jasmine rice with naan for soaking up the sauce.
Tampilkan postingan dengan label chicken. Tampilkan semua postingan
Rabu, 25 Februari 2015
Rabu, 21 Januari 2015
Florentine Lasagna Roll-ups
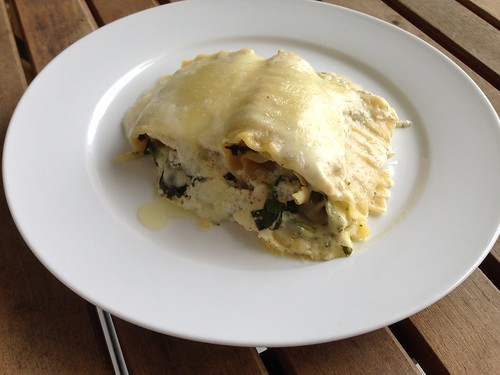
I haven't made a lasagna roll-up in years. I don't know why; they're so easy to make and more fun than regular lasagna because everyone gets their own roll or two. As soon as Kylee posted these Florentine Lasagna Roll-ups on her blog I knew I had to make them.
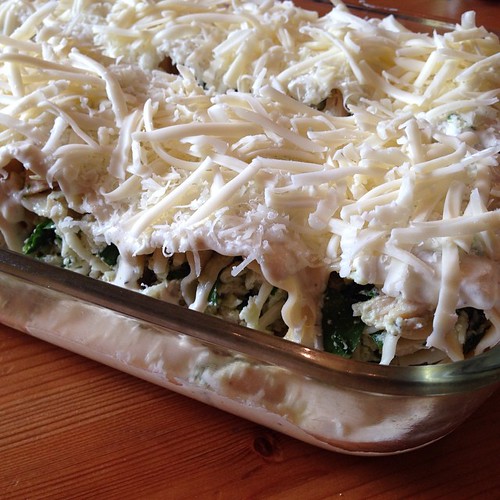
I prepped the roll-ups on a Sunday and popped it in the fridge for later in the week. The night we had them for dinner I just had to preheat the oven, make the salad while the roll-ups cooked and dinner was served. I love easy meals like that.
The only change I made was adding ricotta cheese to the filling. I had some to use up and ricotta is synonymous with lasagna, in my opinion. But feel free to leave it out since there's enough going on with that delectable Alfredo sauce.
Florentine Lasagna Roll-ups
Slightly modified from Kylee Cooks
Alfredo sauce:
1 stick butter
2 large garlic cloves, minced
2oz cream cheese
2 cups half and half
salt and pepper, to taste
1/2 teaspoon dried Italian seasoning
1/2 cup Parmesan cheese
12 lasagna noodles
Filling:
2 cups cooked and shredded chicken
1 1/2 cups baby spinach, chopped finely
1 cup ricotta cheese
1 teaspoon dried Italian seasoning
Salt and pepper, to taste
1 1/2 cups shredded mozzarella, or cheese of your choice
In a medium saucepan, melt the butter over medium heat. Add garlic and cook for about 1 minute. Add the cream cheese and whisk until smooth. Whisk in the half and half. Season with salt, pepper and Italian seasoning. Bring to a simmer (don�t boil!) and whisk frequently until the sauce thickens, about 15 minutes. Add the Parmesan and whisk until melted and blended. Set aside,
Cook the lasagna noodles according to package directions. Drain and rinse the noodles with cold water. Lay them out to dry on clean kitchen towels. This will make them easier to work with.
While the noodles are cooking, combine the chicken, spinach, ricotta, Italian seasoning, salt, pepper and 1 cup mozzarella cheese in a large bowl.
Spread about half a cup of the Alfredo sauce in a 9x13" baking dish. Working with one noodle at a time, place some filling onto each noodle, then roll it up. Place each roll seam side down into your baking dish. Top with the remaining Alfredo sauce and 1/2 cup mozzarella cheese. (If making in advance, stop here, cover the dish with foil or plastic wrap and refrigerate until ready to bake).
Bake at 350 degrees, for about 30 minutes until the casserole is heated through and cheese is bubbling.
I prepped the roll-ups on a Sunday and popped it in the fridge for later in the week. The night we had them for dinner I just had to preheat the oven, make the salad while the roll-ups cooked and dinner was served. I love easy meals like that.
The only change I made was adding ricotta cheese to the filling. I had some to use up and ricotta is synonymous with lasagna, in my opinion. But feel free to leave it out since there's enough going on with that delectable Alfredo sauce.
Florentine Lasagna Roll-ups
Slightly modified from Kylee Cooks
Alfredo sauce:
1 stick butter
2 large garlic cloves, minced
2oz cream cheese
2 cups half and half
salt and pepper, to taste
1/2 teaspoon dried Italian seasoning
1/2 cup Parmesan cheese
12 lasagna noodles
Filling:
2 cups cooked and shredded chicken
1 1/2 cups baby spinach, chopped finely
1 cup ricotta cheese
1 teaspoon dried Italian seasoning
Salt and pepper, to taste
1 1/2 cups shredded mozzarella, or cheese of your choice
In a medium saucepan, melt the butter over medium heat. Add garlic and cook for about 1 minute. Add the cream cheese and whisk until smooth. Whisk in the half and half. Season with salt, pepper and Italian seasoning. Bring to a simmer (don�t boil!) and whisk frequently until the sauce thickens, about 15 minutes. Add the Parmesan and whisk until melted and blended. Set aside,
Cook the lasagna noodles according to package directions. Drain and rinse the noodles with cold water. Lay them out to dry on clean kitchen towels. This will make them easier to work with.
While the noodles are cooking, combine the chicken, spinach, ricotta, Italian seasoning, salt, pepper and 1 cup mozzarella cheese in a large bowl.
Spread about half a cup of the Alfredo sauce in a 9x13" baking dish. Working with one noodle at a time, place some filling onto each noodle, then roll it up. Place each roll seam side down into your baking dish. Top with the remaining Alfredo sauce and 1/2 cup mozzarella cheese. (If making in advance, stop here, cover the dish with foil or plastic wrap and refrigerate until ready to bake).
Bake at 350 degrees, for about 30 minutes until the casserole is heated through and cheese is bubbling.
Senin, 29 Desember 2014
Recipe Redo: Polish Chicken
My grandmother has been making this recipe for Polish Chicken for as long as I can remember. It's the ultimate comfort food and one of those meals that instantly transports me back to my childhood.
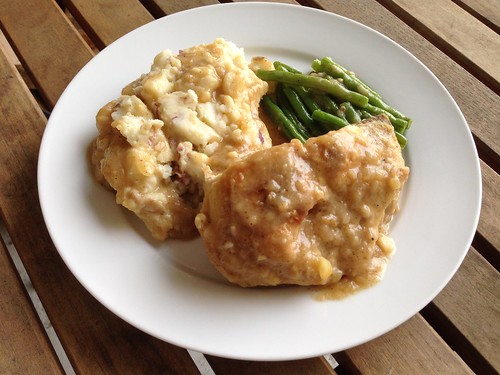
I went through a period where I didn't like meat on the bone (sacrilege) but thankfully I got over it. This is absolutely a meal you want to make with bone-in chicken. The bone helps the meat stay moist and tender. There's nothing complicated about this recipe, making it perfect for both a weeknight or a hearty, warming Sunday dinner. I think the gravy is my favorite part. As you can see in the photo, I smother everything on the plate with copious amounts. My grandmother always served Polish chicken with mashed potatoes and green beans so that's what I do, too.
And if you're wondering why this is called Polish chicken, I asked my grandmother and she said it's just what her mother called it when she was making it and the name stuck. Her family is Polish, so there you go. Regardless, it's delicious.
Polish Chicken
My grandmother's recipe
4 bone-in, skin-on chicken breasts*
1/4 cup flour
1 teaspoon garlic powder
1 teaspoon onion powder
salt and pepper
2 tablespoons vegetable oil
1 small onion, minced
2 cups water
1 cube chicken bouillon
Place the chicken in a resealable plastic food storage bag or in a baking dish. Add the flour, garlic and onion powder, and some salt and pepper. Seal the bag and toss to coat the chicken evenly in the flour (if using a baking dish, rub the flour and seasoning over the chicken to coat both sides).
Heat the oil in a large, deep skillet (make sure the skillet has a lid) over medium heat. Add the chicken, skin side down. Cook for 5 minutes, until the skin is brown and crispy. Flip and cook another 5 minutes. Add the minced onion around the chicken pieces and cook for about 5 minutes, until the onions begin to soften.
While the onion is cooking, bring the water to a boil (you can use an electric kettle, a pan on the stove, or heat it in the microwave). Add the bouillon cube and stir to dissolve. Once the onions are soft, add the water to the skillet. Bring to a boil, reduce the heat to medium-low, then cover. Cook for 25-30 minutes, stirring and turning the chicken every so often.
If the gravy looks a little thin, put a few tablespoons of flour in a bowl and add some water to make a paste. Whisk the paste into the gravy in the skillet. You should see the gravy thicken immediately. Taste the gravy and adjust the seasoning with salt and pepper, as needed.
Serve the chicken topped with the gravy.
*You can also use thighs or legs, just increase the amount based on how much you think your family will eat.
I went through a period where I didn't like meat on the bone (sacrilege) but thankfully I got over it. This is absolutely a meal you want to make with bone-in chicken. The bone helps the meat stay moist and tender. There's nothing complicated about this recipe, making it perfect for both a weeknight or a hearty, warming Sunday dinner. I think the gravy is my favorite part. As you can see in the photo, I smother everything on the plate with copious amounts. My grandmother always served Polish chicken with mashed potatoes and green beans so that's what I do, too.
And if you're wondering why this is called Polish chicken, I asked my grandmother and she said it's just what her mother called it when she was making it and the name stuck. Her family is Polish, so there you go. Regardless, it's delicious.
Polish Chicken
My grandmother's recipe
4 bone-in, skin-on chicken breasts*
1/4 cup flour
1 teaspoon garlic powder
1 teaspoon onion powder
salt and pepper
2 tablespoons vegetable oil
1 small onion, minced
2 cups water
1 cube chicken bouillon
Place the chicken in a resealable plastic food storage bag or in a baking dish. Add the flour, garlic and onion powder, and some salt and pepper. Seal the bag and toss to coat the chicken evenly in the flour (if using a baking dish, rub the flour and seasoning over the chicken to coat both sides).
Heat the oil in a large, deep skillet (make sure the skillet has a lid) over medium heat. Add the chicken, skin side down. Cook for 5 minutes, until the skin is brown and crispy. Flip and cook another 5 minutes. Add the minced onion around the chicken pieces and cook for about 5 minutes, until the onions begin to soften.
While the onion is cooking, bring the water to a boil (you can use an electric kettle, a pan on the stove, or heat it in the microwave). Add the bouillon cube and stir to dissolve. Once the onions are soft, add the water to the skillet. Bring to a boil, reduce the heat to medium-low, then cover. Cook for 25-30 minutes, stirring and turning the chicken every so often.
If the gravy looks a little thin, put a few tablespoons of flour in a bowl and add some water to make a paste. Whisk the paste into the gravy in the skillet. You should see the gravy thicken immediately. Taste the gravy and adjust the seasoning with salt and pepper, as needed.
Serve the chicken topped with the gravy.
*You can also use thighs or legs, just increase the amount based on how much you think your family will eat.
Jumat, 19 Desember 2014
Pasta with Chicken Meatballs
Raise your hand if you miss natural light? ::raises hand:: My photos are nothing special in the spring and summer, but once I lose the natural light all bets are off. And it makes me so sad because I know people choose recipes in part because of the drool-inducing photos. So, my apologies, but you'll have to trust me that this was incredible.
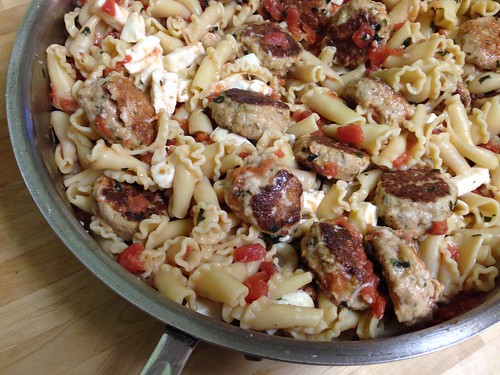
On our flight home from California SP and I both watched cooking shows on the plane. During an episode of Giada's show she made Orecchiette with Mini Chicken Meatballs. It looked so delicious I knew I had to make it as soon as we got home.
I made a few modifications, subbing campagnelle for the orecchiette since I had a box in the pantry. Really, any small shape will do. I also used diced tomatoes because I'm weird and don't like loose tomato skin. Because I used canned tomatoes, I measured out the liquid in the can and then topped it off with chicken broth.
This was truly outstanding, with light, tender meatballs and a delicious sauce made even better by the addition of fresh, melty, gooey mozzarella cheese. The recipe made enough food to feed an army, which was good because we were all fighting over the leftovers.
Pasta with Chicken Meatballs
Slightly adapted from Giada De Laurentiis
1 pound small cut pasta, such as orecchiette, campagnelle, penne, etc.
1/4 cup dry bread crumbs
1/4 cup chopped fresh flat-leaf parsley
2 large eggs, lightly beaten
1 tablespoon milk
1 tablespoon ketchup
3/4 cup grated Pecorino Romano cheese
3/4 teaspoon salt
3/4 teaspoon freshly ground black pepper
1 pound ground chicken
1/4 cup olive oil
chicken stock (amount will vary, see directions)
1 28-oz can diced tomatoes, juice reserved
1/2 cup freshly grated Parmesan or more Pecorino
8 ounces fresh mozzarella, cut into small pieces
1/2 cup chopped fresh basil leaves
Bring a large pot of salted water to a boil over high heat. Add the pasta and cook according to package directions. Drain the pasta, reserving about 1 cup of the pasta water. Set aside.
In a medium bowl, stir together the bread crumbs, parsley, eggs, milk, ketchup, cheese, and the salt and pepper. Add the chicken and gently stir to combine. With wet hands (this is key, otherwise the chicken will just stick to you rather than form into meatballs), roll the chicken into mini meatballs. Make them as big or as small as you want. You'll need to wet your hands often so keep a bowl of water nearby.
In a large skillet, heat the oil over medium-high heat. Add the meatballs and cook without moving until brown on the bottom, about 2 minutes. Turn the meatballs over and brown the other side, about 2 minutes longer.
Add the juice from the tomatoes to a large measuring cup. Add enough chicken stock to make 1 1/2 cups total. Add the chicken stock, tomato juice and tomatoes to the skillet. Bring to a boil. Using a wooden spoon, scrape up the brown bits from the bottom of the pan. Reduce the heat to low and simmer until the meatballs are cooked through, about 5 minutes.
Add the pasta to the skillet. Add the Parmesan and toss, adding reserved pasta water, if needed, to loosen the pasta. Add the mozzarella cheese and chopped basil. Gently toss to combine. Serve immediately.
On our flight home from California SP and I both watched cooking shows on the plane. During an episode of Giada's show she made Orecchiette with Mini Chicken Meatballs. It looked so delicious I knew I had to make it as soon as we got home.
I made a few modifications, subbing campagnelle for the orecchiette since I had a box in the pantry. Really, any small shape will do. I also used diced tomatoes because I'm weird and don't like loose tomato skin. Because I used canned tomatoes, I measured out the liquid in the can and then topped it off with chicken broth.
This was truly outstanding, with light, tender meatballs and a delicious sauce made even better by the addition of fresh, melty, gooey mozzarella cheese. The recipe made enough food to feed an army, which was good because we were all fighting over the leftovers.
Pasta with Chicken Meatballs
Slightly adapted from Giada De Laurentiis
1 pound small cut pasta, such as orecchiette, campagnelle, penne, etc.
1/4 cup dry bread crumbs
1/4 cup chopped fresh flat-leaf parsley
2 large eggs, lightly beaten
1 tablespoon milk
1 tablespoon ketchup
3/4 cup grated Pecorino Romano cheese
3/4 teaspoon salt
3/4 teaspoon freshly ground black pepper
1 pound ground chicken
1/4 cup olive oil
chicken stock (amount will vary, see directions)
1 28-oz can diced tomatoes, juice reserved
1/2 cup freshly grated Parmesan or more Pecorino
8 ounces fresh mozzarella, cut into small pieces
1/2 cup chopped fresh basil leaves
Bring a large pot of salted water to a boil over high heat. Add the pasta and cook according to package directions. Drain the pasta, reserving about 1 cup of the pasta water. Set aside.
In a medium bowl, stir together the bread crumbs, parsley, eggs, milk, ketchup, cheese, and the salt and pepper. Add the chicken and gently stir to combine. With wet hands (this is key, otherwise the chicken will just stick to you rather than form into meatballs), roll the chicken into mini meatballs. Make them as big or as small as you want. You'll need to wet your hands often so keep a bowl of water nearby.
In a large skillet, heat the oil over medium-high heat. Add the meatballs and cook without moving until brown on the bottom, about 2 minutes. Turn the meatballs over and brown the other side, about 2 minutes longer.
Add the juice from the tomatoes to a large measuring cup. Add enough chicken stock to make 1 1/2 cups total. Add the chicken stock, tomato juice and tomatoes to the skillet. Bring to a boil. Using a wooden spoon, scrape up the brown bits from the bottom of the pan. Reduce the heat to low and simmer until the meatballs are cooked through, about 5 minutes.
Add the pasta to the skillet. Add the Parmesan and toss, adding reserved pasta water, if needed, to loosen the pasta. Add the mozzarella cheese and chopped basil. Gently toss to combine. Serve immediately.
Senin, 15 Desember 2014
Indonesian Ginger Chicken
I've mentioned before that SP has taken over cooking Sunday dinner. He's been on an Ina Garten kick lately and was very excited to make her Indonesian Ginger Chicken.
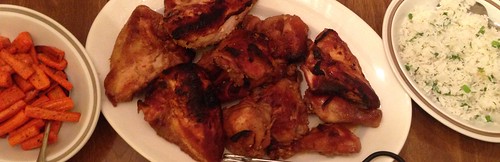
This was some seriously awesome chicken. Incredibly flavorful from the marinade and really easy to cook. He used two cut-up chickens from the grocery store and we noticed that the white meat wasn't nearly as flavorful as the dark meat. You could really taste the marinade in the dark meat pieces. As much as I love white meat, I think this would be best with legs and thighs rather than whole chickens.
He served the chicken with herb basmati rice and roasted carrots. At my recommendation, he boiled the marinade to thicken it into a gravy to serve over the chicken. That was a big hit as well.
Indonesian Ginger Chicken
From Ina Garten
1 cup honey
3/4 cup soy sauce
1/4 cup minced garlic (8 to 12 cloves)
1/2 cup peeled and grated fresh ginger
6lbs total bone-in chicken legs and thighs
Cook the honey, soy sauce, garlic, and ginger in a small saucepan over low heat until the honey is melted. Arrange the chicken pieces in 1 layer in a shallow baking pan, skin side down. Pour on the sauce. Cover the pan tightly with aluminum foil. Marinate overnight in the refrigerator.
Preheat the oven to 350 degrees.
Place the baking pan, still covered with the foil, in the oven and bake for 30 minutes. Remove the foil, turn the chicken pieces skin side up, and raise the temperature to 375 degrees. Continue baking for 30 minutes or until the juices run clear when you cut between a leg and thigh and the sauce is a rich, dark brown.
If you want, remove the chicken pieces to a serving platter and cover with foil. Strain the sauce from the baking dish through a sieve and add to a small pot. Boil the sauce until it thickens slightly. Serve as gravy to spoon over the chicken.
This was some seriously awesome chicken. Incredibly flavorful from the marinade and really easy to cook. He used two cut-up chickens from the grocery store and we noticed that the white meat wasn't nearly as flavorful as the dark meat. You could really taste the marinade in the dark meat pieces. As much as I love white meat, I think this would be best with legs and thighs rather than whole chickens.
He served the chicken with herb basmati rice and roasted carrots. At my recommendation, he boiled the marinade to thicken it into a gravy to serve over the chicken. That was a big hit as well.
Indonesian Ginger Chicken
From Ina Garten
1 cup honey
3/4 cup soy sauce
1/4 cup minced garlic (8 to 12 cloves)
1/2 cup peeled and grated fresh ginger
6lbs total bone-in chicken legs and thighs
Cook the honey, soy sauce, garlic, and ginger in a small saucepan over low heat until the honey is melted. Arrange the chicken pieces in 1 layer in a shallow baking pan, skin side down. Pour on the sauce. Cover the pan tightly with aluminum foil. Marinate overnight in the refrigerator.
Preheat the oven to 350 degrees.
Place the baking pan, still covered with the foil, in the oven and bake for 30 minutes. Remove the foil, turn the chicken pieces skin side up, and raise the temperature to 375 degrees. Continue baking for 30 minutes or until the juices run clear when you cut between a leg and thigh and the sauce is a rich, dark brown.
If you want, remove the chicken pieces to a serving platter and cover with foil. Strain the sauce from the baking dish through a sieve and add to a small pot. Boil the sauce until it thickens slightly. Serve as gravy to spoon over the chicken.
Senin, 08 Desember 2014
Skillet Chicken Saltimbocca Spaghetti
I've done it again. I'm sorry that I disappeared for a few weeks. This whole blogging thing has become a lot more complicated these days. We're just so busy. And the lack of natural light, coupled with a waning desire to be in the kitchen, isn't exactly conducive to blogging.
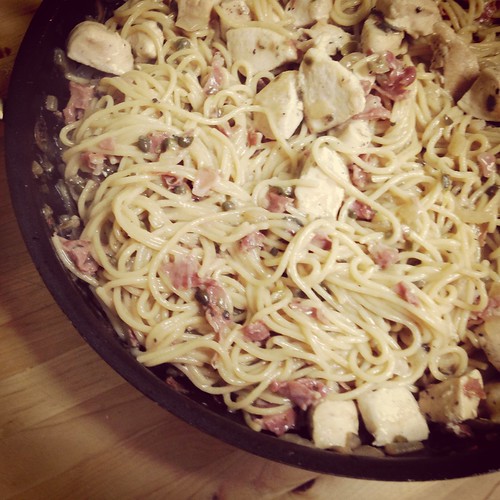
I wish my photo of this Skillet Chicken Saltimbocca Spaghetti was better because this is one outstanding meal. Go look at Elly's photo to see it in all its drool-inducing glory.
We all thought this was outstanding. Baby Girl isn't a huge fan of capers, but otherwise this was right up her alley. I can't wait to make it again.
Skillet Chicken Saltimbocca Spaghetti
As seen on Elly Says Opa!
2 tablespoons olive oil
4 oz. thinly sliced prosciutto, chopped
8 large fresh sages leaves, plus 3 Tbsp. minced sage
1 lb. boneless/skinless chicken breast, cut into pieces
1 medium onion, diced
4 cloves garlic, minced
pinch of red pepper flakes
2 teaspoons flour
1 cup dry white wine
3 1/2 cups low-sodium chicken broth
1 cup water
12 oz. dried spaghetti, broken in half
3 tablespoons capers, rinsed and chopped
2 tablespoons unsalted butter
1/2 teaspoon lemon zest + 2-3 tablespoons juice
Heat 1 1/2 tablespoons of the oil in a large, nonstick skillet over medium-high heat. Add the prosciutto and cook, stirring occasionally, until crisp (about 5 minutes). During the last 30 seconds or so, add the sage leaves and cook until crisp. Using a slotted spoon, transfer the prosciutto and sage to a paper-towel lined plate.
Season the chicken with salt and pepper and then place in the hot skillet. Cook until browned and just shy of cooked through. Remove the chicken and keep warm.
Add the remaining 1/2 tablespoon oil to the skillet. Stir in the onion and cook over medium heat until softened, about 5-6 minutes. Stir in the minced sage, garlic, and red pepper flakes, and saute until fragrant, about 30 seconds. Add the flour and cook for one minute before whisking in the wine. Simmer until reduced by half, about 1-2 minutes.
Slowly whisk in the broth and water. and then stir in the pasta. Increase the heat to medium-high and cook at a vigorous simmer, stirring often with tongs, until pasta is tender and sauce has thickened (about 12 minutes).
Add the chicken and cook just a minute longer, until completely cooked and warmed through. Stir in the capers, butter, lemon zest, and lemon juice, and season to taste with salt and pepper. Serve the pasta with the crispy prosciutto and sage.
I wish my photo of this Skillet Chicken Saltimbocca Spaghetti was better because this is one outstanding meal. Go look at Elly's photo to see it in all its drool-inducing glory.
We all thought this was outstanding. Baby Girl isn't a huge fan of capers, but otherwise this was right up her alley. I can't wait to make it again.
Skillet Chicken Saltimbocca Spaghetti
As seen on Elly Says Opa!
2 tablespoons olive oil
4 oz. thinly sliced prosciutto, chopped
8 large fresh sages leaves, plus 3 Tbsp. minced sage
1 lb. boneless/skinless chicken breast, cut into pieces
1 medium onion, diced
4 cloves garlic, minced
pinch of red pepper flakes
2 teaspoons flour
1 cup dry white wine
3 1/2 cups low-sodium chicken broth
1 cup water
12 oz. dried spaghetti, broken in half
3 tablespoons capers, rinsed and chopped
2 tablespoons unsalted butter
1/2 teaspoon lemon zest + 2-3 tablespoons juice
Heat 1 1/2 tablespoons of the oil in a large, nonstick skillet over medium-high heat. Add the prosciutto and cook, stirring occasionally, until crisp (about 5 minutes). During the last 30 seconds or so, add the sage leaves and cook until crisp. Using a slotted spoon, transfer the prosciutto and sage to a paper-towel lined plate.
Season the chicken with salt and pepper and then place in the hot skillet. Cook until browned and just shy of cooked through. Remove the chicken and keep warm.
Add the remaining 1/2 tablespoon oil to the skillet. Stir in the onion and cook over medium heat until softened, about 5-6 minutes. Stir in the minced sage, garlic, and red pepper flakes, and saute until fragrant, about 30 seconds. Add the flour and cook for one minute before whisking in the wine. Simmer until reduced by half, about 1-2 minutes.
Slowly whisk in the broth and water. and then stir in the pasta. Increase the heat to medium-high and cook at a vigorous simmer, stirring often with tongs, until pasta is tender and sauce has thickened (about 12 minutes).
Add the chicken and cook just a minute longer, until completely cooked and warmed through. Stir in the capers, butter, lemon zest, and lemon juice, and season to taste with salt and pepper. Serve the pasta with the crispy prosciutto and sage.
Jumat, 21 November 2014
Oven Fried Chicken
You may remember our friends C & T from Mexican night, Italian night and our previous try at Southern night. Unfortunately, the last Southern night was a disaster. Undercooked fried chicken, way too salty collard greens and disappointing cornbread. We didn't eat until almost 9pm because of the darn chicken. We knew we had to try again. Thankfully this time we nailed it.
Since T's fryer isn't very big, and because we'd undercooked the chicken the last time, we decided to use Ina Garten's oven method for frying the chicken. This is a truly brilliant method. You fry the pieces so they get a nice, crispy, golden brown crust and then you finish cooking them in the oven. This ensures the chicken is cooked through, but the best part is you can cook a lot of chicken at one time so you're ready to feed a crowd all at once.
T brined the chicken all day and then she (once again) conned me into breading the chicken while she took pictures. It's a good thing she's an excellent photographer. I dipped the chicken into buttermilk first and then into the seasoned flour, then back into the buttermilk and finished with the flour.
We were able to fry 4 legs or two breasts at once. As each batch was finished, we laid the pieces on a cooling rack. Once the rack was full it went into the oven. Thirty minutes later we took it out and tested each piece with a meat thermometer to make sure it was 165 degrees.
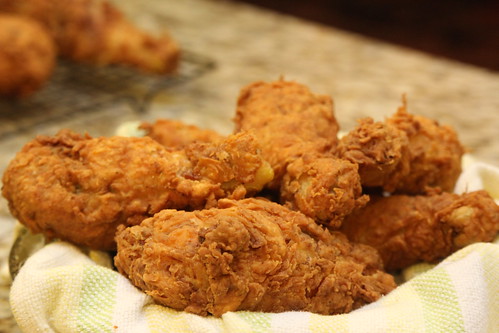
Look at these gorgeous pieces of chicken. Moist and flavorful. We SO nailed it. In addition to the chicken I made cornbread and collard greens. Stay tuned for those recipes to post next week.
Oven Fried Chicken
Prep compiled from various recipes, cooking method from Ina Garten
bone-in chicken pieces (legs, thighs, breasts)
Brine:
kosher salt
sugar
thyme
onion powder
Tabasco sauce
water
Vegetable oil
Breading:
buttermilk
flour
salt
pepper
paprika
Place the chicken pieces in large plastic food storage bags. Fill each bag with water and add some salt, sugar, thyme, onion powder and a few dashes of tabasco sauce. Just use as much as you want - T didn't measure. Refrigerate overnight or at least 6 hours.
Take the chicken out of the brine and let sit, covered, at room temperature for at least 4 hours.
Preheat the oven to 350 degrees. Heat oil into a large heavy-bottomed stockpot to a depth of 1-inch or a deep fryer. Heat to 350 degrees.
Pour some buttermilk into a large bowl. Combine the flour, salt, pepper, and paprika in another large bowl. Coat each piece of chicken in buttermilk then in the flour mixture, back into the buttermilk and into the flour again.
Working in batches, carefully place several pieces of chicken in the oil and fry for about 3 minutes on each side until the coating is a light golden brown (if using a deep fryer, cook for 6 minutes). Don't crowd the pieces.
Remove the chicken from the oil and place each piece on a metal baking rack set on a sheet pan. Allow the oil to return to 360 degrees before frying the next batch. When all the chicken is fried, bake for 30 to 40 minutes, until the chicken is no longer pink inside and registers 165 degrees on a thermometer.
Since T's fryer isn't very big, and because we'd undercooked the chicken the last time, we decided to use Ina Garten's oven method for frying the chicken. This is a truly brilliant method. You fry the pieces so they get a nice, crispy, golden brown crust and then you finish cooking them in the oven. This ensures the chicken is cooked through, but the best part is you can cook a lot of chicken at one time so you're ready to feed a crowd all at once.
T brined the chicken all day and then she (once again) conned me into breading the chicken while she took pictures. It's a good thing she's an excellent photographer. I dipped the chicken into buttermilk first and then into the seasoned flour, then back into the buttermilk and finished with the flour.
We were able to fry 4 legs or two breasts at once. As each batch was finished, we laid the pieces on a cooling rack. Once the rack was full it went into the oven. Thirty minutes later we took it out and tested each piece with a meat thermometer to make sure it was 165 degrees.
Look at these gorgeous pieces of chicken. Moist and flavorful. We SO nailed it. In addition to the chicken I made cornbread and collard greens. Stay tuned for those recipes to post next week.
Oven Fried Chicken
Prep compiled from various recipes, cooking method from Ina Garten
bone-in chicken pieces (legs, thighs, breasts)
Brine:
kosher salt
sugar
thyme
onion powder
Tabasco sauce
water
Vegetable oil
Breading:
buttermilk
flour
salt
pepper
paprika
Place the chicken pieces in large plastic food storage bags. Fill each bag with water and add some salt, sugar, thyme, onion powder and a few dashes of tabasco sauce. Just use as much as you want - T didn't measure. Refrigerate overnight or at least 6 hours.
Take the chicken out of the brine and let sit, covered, at room temperature for at least 4 hours.
Preheat the oven to 350 degrees. Heat oil into a large heavy-bottomed stockpot to a depth of 1-inch or a deep fryer. Heat to 350 degrees.
Pour some buttermilk into a large bowl. Combine the flour, salt, pepper, and paprika in another large bowl. Coat each piece of chicken in buttermilk then in the flour mixture, back into the buttermilk and into the flour again.
Working in batches, carefully place several pieces of chicken in the oil and fry for about 3 minutes on each side until the coating is a light golden brown (if using a deep fryer, cook for 6 minutes). Don't crowd the pieces.
Remove the chicken from the oil and place each piece on a metal baking rack set on a sheet pan. Allow the oil to return to 360 degrees before frying the next batch. When all the chicken is fried, bake for 30 to 40 minutes, until the chicken is no longer pink inside and registers 165 degrees on a thermometer.
Jumat, 07 November 2014
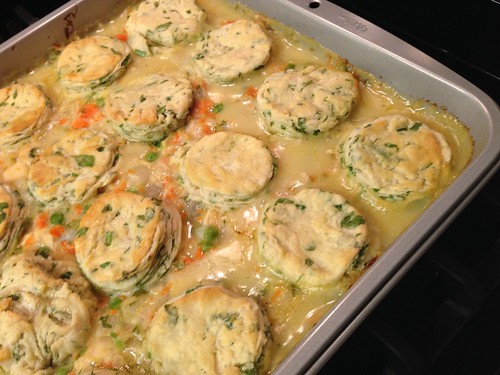
Chicken Stew with Biscuits
It's official - SP is now in charge of Sunday dinner at my parent's house. Weekends are really the only chance he has to cook since he's got such a long commute, so it's a win-win. As much as I love cooking, it's nice to get a break every once in awhile.
He's been on the hunt for new recipes and came across Ina's Chicken Stew with Biscuits. This is a dish I've had my eye on for years but, and this may be sacrilege, I'm not really a chicken pot pie fan. I know, I know. And since this is basically chicken pot pie filling topped with biscuits, I wasn't sold on the idea. But everyone else loves chicken pot pie so I took one for the team.
This was incredible. And that's saying a lot coming from me. The chicken was moist and tender, the veggies were perfectly cooked. Everything was perfectly proportioned. The biscuits were just OK, not very flaky or fluffy, but SP has plans to make different biscuits next time. My parents also loved it, so it's a good thing the recipe makes enough to feed an army. SP, my mom and my stepdad all had seconds and we still had 6 servings leftover. Sheesh!
This does take quite a bit of prep work and time, so it's not a weeknight meal, but you can make it on a weekend and bake it during the week. And the leftovers reheated quite well.
Chicken Stew with Biscuits
From Ina Garten
6 split chicken breasts, bone in, skin on
3 tablespoons olive oil
Kosher salt and freshly ground black pepper
5 cups chicken stock
2 chicken bouillon cubes
1 1/2 sticks unsalted butter
2 cups chopped yellow onions (2 onions)
3/4 cup flour
1/4 cup half and half
2 cups medium-diced carrots (4 carrots), blanched for 2 minutes
1 10-ounce package frozen peas (2 cups)
1 1/2 cups frozen pearl onions
1/2 cup minced fresh parsley
For the biscuits:
2 cups flour
1 tablespoon baking powder
1 teaspoon kosher salt
1 teaspoon sugar
1 stick cold unsalted butter, diced
3/4 cup half-and-half
1/2 cup chopped fresh parsley
1 egg mixed with 1 tablespoon water, for egg wash
Preheat the oven to 375.
Place the chicken breasts on a sheet pan and rub them with olive oil. Sprinkle generously with salt and pepper. Roast for 1 hour. Set aside until cool enough to handle, then remove the meat from the bones and discard the skin. Cut the chicken into large dice.
In a small saucepan, heat the chicken stock and dissolve the bouillon cubes in the stock.
In a large pot or Dutch oven, melt the butter and saute the onions over medium-low heat for 10 to 15 minutes, until translucent. Add the flour and cook over low heat, stirring constantly, for 2 minutes. Add the hot chicken stock to the sauce. Simmer over low heat for 1 more minute, stirring, until thick. Add 2 teaspoons salt, 1/2 teaspoon pepper, and the half and half. Add the cubed chicken, carrots, peas, onions, and parsley. Mix well.
Put the stew in a lasagna pan or 10 x 13 x 2-inch oval or rectangular baking dish. This will NOT fit in a standard 9 x 13 dish - you need something deeper. Place the baking dish on a sheet pan lined with parchment or wax paper. Bake for 15 minutes.
Meanwhile, make the biscuits. Combine the flour, baking powder, salt, and sugar in the bowl of an electric mixer fitted with the paddle attachment. Add the butter and mix on low speed until the butter is the size of peas. Add the half-and-half and combine on low speed. Mix in the parsley. Dump the dough out on a well-floured board and, with a rolling pin, roll out to 3/8-inch thick. Cut out twelve circles with a 2 1/2-inch round cutter.
Remove the stew from the oven and arrange the biscuits on top of the filling. Brush them with egg wash, and return the dish to the oven. Bake for another 20 to 30 minutes, until the biscuits are brown and the stew is bubbly.
Note: To make in advance, refrigerate the chicken stew and biscuits separately. Bake the stew for 25 minutes, then place the biscuits on top, and bake for another 30 minutes, until done.
He's been on the hunt for new recipes and came across Ina's Chicken Stew with Biscuits. This is a dish I've had my eye on for years but, and this may be sacrilege, I'm not really a chicken pot pie fan. I know, I know. And since this is basically chicken pot pie filling topped with biscuits, I wasn't sold on the idea. But everyone else loves chicken pot pie so I took one for the team.
This was incredible. And that's saying a lot coming from me. The chicken was moist and tender, the veggies were perfectly cooked. Everything was perfectly proportioned. The biscuits were just OK, not very flaky or fluffy, but SP has plans to make different biscuits next time. My parents also loved it, so it's a good thing the recipe makes enough to feed an army. SP, my mom and my stepdad all had seconds and we still had 6 servings leftover. Sheesh!
This does take quite a bit of prep work and time, so it's not a weeknight meal, but you can make it on a weekend and bake it during the week. And the leftovers reheated quite well.
Chicken Stew with Biscuits
From Ina Garten
6 split chicken breasts, bone in, skin on
3 tablespoons olive oil
Kosher salt and freshly ground black pepper
5 cups chicken stock
2 chicken bouillon cubes
1 1/2 sticks unsalted butter
2 cups chopped yellow onions (2 onions)
3/4 cup flour
1/4 cup half and half
2 cups medium-diced carrots (4 carrots), blanched for 2 minutes
1 10-ounce package frozen peas (2 cups)
1 1/2 cups frozen pearl onions
1/2 cup minced fresh parsley
For the biscuits:
2 cups flour
1 tablespoon baking powder
1 teaspoon kosher salt
1 teaspoon sugar
1 stick cold unsalted butter, diced
3/4 cup half-and-half
1/2 cup chopped fresh parsley
1 egg mixed with 1 tablespoon water, for egg wash
Preheat the oven to 375.
Place the chicken breasts on a sheet pan and rub them with olive oil. Sprinkle generously with salt and pepper. Roast for 1 hour. Set aside until cool enough to handle, then remove the meat from the bones and discard the skin. Cut the chicken into large dice.
In a small saucepan, heat the chicken stock and dissolve the bouillon cubes in the stock.
In a large pot or Dutch oven, melt the butter and saute the onions over medium-low heat for 10 to 15 minutes, until translucent. Add the flour and cook over low heat, stirring constantly, for 2 minutes. Add the hot chicken stock to the sauce. Simmer over low heat for 1 more minute, stirring, until thick. Add 2 teaspoons salt, 1/2 teaspoon pepper, and the half and half. Add the cubed chicken, carrots, peas, onions, and parsley. Mix well.
Put the stew in a lasagna pan or 10 x 13 x 2-inch oval or rectangular baking dish. This will NOT fit in a standard 9 x 13 dish - you need something deeper. Place the baking dish on a sheet pan lined with parchment or wax paper. Bake for 15 minutes.
Meanwhile, make the biscuits. Combine the flour, baking powder, salt, and sugar in the bowl of an electric mixer fitted with the paddle attachment. Add the butter and mix on low speed until the butter is the size of peas. Add the half-and-half and combine on low speed. Mix in the parsley. Dump the dough out on a well-floured board and, with a rolling pin, roll out to 3/8-inch thick. Cut out twelve circles with a 2 1/2-inch round cutter.
Remove the stew from the oven and arrange the biscuits on top of the filling. Brush them with egg wash, and return the dish to the oven. Bake for another 20 to 30 minutes, until the biscuits are brown and the stew is bubbly.
Note: To make in advance, refrigerate the chicken stew and biscuits separately. Bake the stew for 25 minutes, then place the biscuits on top, and bake for another 30 minutes, until done.
Senin, 03 November 2014
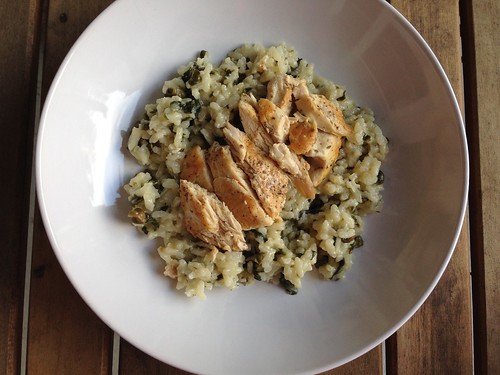
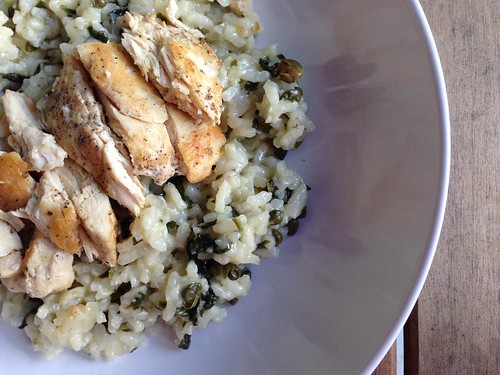
Chicken Piccata Risotto with Crispy Capers
This. Was. Incredible.
It's times like these that I wish I was a better food photographer. I don't feel like my photos adequately express how amazing this was, and that makes me sad. Because I want every person who reads this post to make this dish. That's how much we enjoyed it.
Baby Girl is a big risotto fan and I'm always on the lookout for new recipes. I saw this Lighter Chicken Piccata Risotto with Crispy Capers on Iowa Girl Eats and as soon as I saw her post I knew we'd love it. I'm a sucker for all things salty and the tang from the capers and lemon was just perfect.
The original recipe calls for adding all the chicken broth at once, but I'm a purist when it comes to risotto. I also omitted the garlic and added some white wine because that's how I always make risotto. SP had a work dinner the night I made this so he didn't get to taste it until lunch the next day. He actually sent me an email to say lunch was excellent. I can't wait to make this one again.
Chicken Piccata Risotto with Crispy Capers
Very slightly modified from Iowa Girl Eats
6-7 cups chicken broth
2 tablespoons extra virgin olive oil, divided
2 tablespoons butter, divided
1 large shallot, chopped
1 teaspoon fresh thyme, minced
salt and pepper
1 1/2 cups arborio rice
1/4 cup dry white wine
2 cups baby spinach, roughly chopped
1 lemon, cut in half
1/4 cup freshly grated parmesan cheese
1/4 cup capers, drained and patted dry
2 chicken breasts, cut in half lengthwise
Bring chicken broth to a boil in a saucepan then turn down the heat and keep at a simmer.
In a deep, heavy skillet, melt 1 tablespoon butter and 1 tablespoon oil over medium-high heat. Add the shallot, season with salt and pepper, and saute for about 2 minutes or until the shallot is tender. Add the thyme and cook for one minute, then add the rice. Cook for another 2-3 minutes to toast the rice, stirring frequently.
Add the white wine and bring to a boil. Once the rice has absorbed the wine, add 1 ladle (approx. 1 cup) of the simmering stock, and keep stirring nearly constantly, making sure to push down any rice stuck to the edges of the pans. Once the liquid is nearly absorbed, add another ladleful of stock. Continue to do this until the rice is cooked but still slightly chewy, about 25 minutes. Taste the rice frequently to check the consistency. If you notice you're running low on broth, add more to the saucepan so you don't run out.
When nearly all the broth has been absorbed but the rice is still creamy, add the spinach. Once the spinach is wilted, taste the rice to make sure it's done. Remove the pan from the heat then stir in the juice from 1/2 lemon, Parmesan cheese, and remaining 1 tablespoon butter. Taste, add salt and pepper if necessary and set aside.
While the risotto is cooking, heat 1 tablespoon of olive oil in a large skillet over medium-high heat. Add the capers and saut� until slightly opened, brown, and crispy, 2-3 minutes. Transfer with a slotted spoon to a paper towel-lined plate to drain.
Season the chicken breasts on both sides with salt and pepper then saute in the caper-infused olive oil, 4 minutes per side. When the chicken has 1 minute left to saute, squeeze the second lemon half over the chicken.
To serve, plate the risotto then top with a piece of chicken. Sprinkle some of the crispy capers on top.
It's times like these that I wish I was a better food photographer. I don't feel like my photos adequately express how amazing this was, and that makes me sad. Because I want every person who reads this post to make this dish. That's how much we enjoyed it.
Baby Girl is a big risotto fan and I'm always on the lookout for new recipes. I saw this Lighter Chicken Piccata Risotto with Crispy Capers on Iowa Girl Eats and as soon as I saw her post I knew we'd love it. I'm a sucker for all things salty and the tang from the capers and lemon was just perfect.
The original recipe calls for adding all the chicken broth at once, but I'm a purist when it comes to risotto. I also omitted the garlic and added some white wine because that's how I always make risotto. SP had a work dinner the night I made this so he didn't get to taste it until lunch the next day. He actually sent me an email to say lunch was excellent. I can't wait to make this one again.
Chicken Piccata Risotto with Crispy Capers
Very slightly modified from Iowa Girl Eats
6-7 cups chicken broth
2 tablespoons extra virgin olive oil, divided
2 tablespoons butter, divided
1 large shallot, chopped
1 teaspoon fresh thyme, minced
salt and pepper
1 1/2 cups arborio rice
1/4 cup dry white wine
2 cups baby spinach, roughly chopped
1 lemon, cut in half
1/4 cup freshly grated parmesan cheese
1/4 cup capers, drained and patted dry
2 chicken breasts, cut in half lengthwise
Bring chicken broth to a boil in a saucepan then turn down the heat and keep at a simmer.
In a deep, heavy skillet, melt 1 tablespoon butter and 1 tablespoon oil over medium-high heat. Add the shallot, season with salt and pepper, and saute for about 2 minutes or until the shallot is tender. Add the thyme and cook for one minute, then add the rice. Cook for another 2-3 minutes to toast the rice, stirring frequently.
Add the white wine and bring to a boil. Once the rice has absorbed the wine, add 1 ladle (approx. 1 cup) of the simmering stock, and keep stirring nearly constantly, making sure to push down any rice stuck to the edges of the pans. Once the liquid is nearly absorbed, add another ladleful of stock. Continue to do this until the rice is cooked but still slightly chewy, about 25 minutes. Taste the rice frequently to check the consistency. If you notice you're running low on broth, add more to the saucepan so you don't run out.
When nearly all the broth has been absorbed but the rice is still creamy, add the spinach. Once the spinach is wilted, taste the rice to make sure it's done. Remove the pan from the heat then stir in the juice from 1/2 lemon, Parmesan cheese, and remaining 1 tablespoon butter. Taste, add salt and pepper if necessary and set aside.
While the risotto is cooking, heat 1 tablespoon of olive oil in a large skillet over medium-high heat. Add the capers and saut� until slightly opened, brown, and crispy, 2-3 minutes. Transfer with a slotted spoon to a paper towel-lined plate to drain.
Season the chicken breasts on both sides with salt and pepper then saute in the caper-infused olive oil, 4 minutes per side. When the chicken has 1 minute left to saute, squeeze the second lemon half over the chicken.
To serve, plate the risotto then top with a piece of chicken. Sprinkle some of the crispy capers on top.
Rabu, 22 Oktober 2014
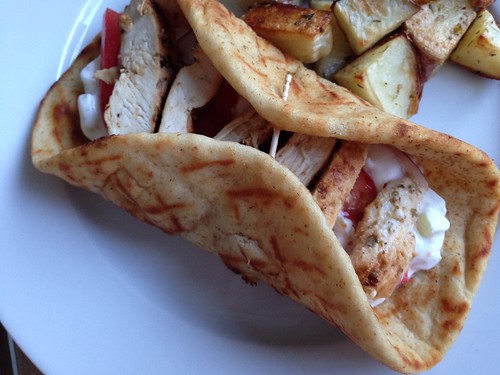
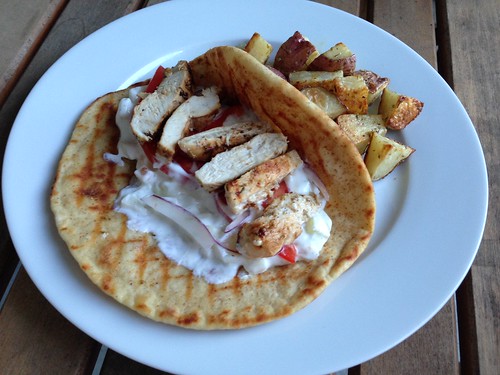
Recipe Redo: Chicken Gyros
A few years ago I made these chicken gyros all. the. time. They were a staple on our dinner table and for good reason - they're delicious. It had been a very long time since I made them and since the photos I took back then weren't exactly stellar, I figured I'd revisit this old favorite and update the photos.
Unfortunately, I still didn't get a great shot of these but they're still better than the old photos. I served the gyros with roasted potatoes liberally seasoned with oregano. I loved dipping the potatoes into some of the leftover tzatziki sauce. Yum.
Chicken Gyros
As seen on Elly Says Opa!
4 cloves garlic, smashed
Juice of 1 lemon
2 teaspoons red wine vinegar
2 tablespoons extra virgin olive oil
2 heaping tablespoons plain Greek yogurt
1 tablespoon dried oregano
1 1/4 lbs. chicken breast, cut in half lengthwise
salt and pepper
1 cup tzatziki (see below)
sliced tomatoes
sliced red onion
4 pocketless pitas or flatbread
Whisk together the garlic, lemon juice, vinegar, oil, yogurt, and oregano in a bowl. Add the chicken and rub the marinade in. Cover and refrigerate for one hour.
Preheat a grill or grill pan over medium-high heat. Season the chicken with salt and pepper on both sides. Add the chicken to the hot grill pan and cook for 5 minutes. Flip over and cook for 4 minutes. Remove to a cutting board and allow the chicken to rest for a few minutes before slicing into strips.
While the chicken is cooking, heat your pitas. If you have a gas stove, turn on a burner to medium heat. Spray the pitas with a little bit of oil and cook them right on the burner for a few seconds per side.
Top the pita with some of the chicken, tzatziki, tomatoes, and onions. Roll up and eat. Be careful, they're messy.
Tzatziki
1 cup plain greek nonfat yogurt
1/2 a small cucumber
Salt and pepper to taste
1 small garlic clove, minced
Squeeze of fresh lemon juice
Put the yogurt in a bowl. Peel the cucumber, then cut it in half lengthwise and remove the seeds. Grate it over the large holes of a box grater. Place the grated cucumber in a clean kitchen towel and ring out the water over the sink. Add the cucumber to the yogurt, along with the other ingredients. Mix well. Taste and adjust the seasonings, as needed. Chill before serving.
Unfortunately, I still didn't get a great shot of these but they're still better than the old photos. I served the gyros with roasted potatoes liberally seasoned with oregano. I loved dipping the potatoes into some of the leftover tzatziki sauce. Yum.
Chicken Gyros
As seen on Elly Says Opa!
4 cloves garlic, smashed
Juice of 1 lemon
2 teaspoons red wine vinegar
2 tablespoons extra virgin olive oil
2 heaping tablespoons plain Greek yogurt
1 tablespoon dried oregano
1 1/4 lbs. chicken breast, cut in half lengthwise
salt and pepper
1 cup tzatziki (see below)
sliced tomatoes
sliced red onion
4 pocketless pitas or flatbread
Whisk together the garlic, lemon juice, vinegar, oil, yogurt, and oregano in a bowl. Add the chicken and rub the marinade in. Cover and refrigerate for one hour.
Preheat a grill or grill pan over medium-high heat. Season the chicken with salt and pepper on both sides. Add the chicken to the hot grill pan and cook for 5 minutes. Flip over and cook for 4 minutes. Remove to a cutting board and allow the chicken to rest for a few minutes before slicing into strips.
While the chicken is cooking, heat your pitas. If you have a gas stove, turn on a burner to medium heat. Spray the pitas with a little bit of oil and cook them right on the burner for a few seconds per side.
Top the pita with some of the chicken, tzatziki, tomatoes, and onions. Roll up and eat. Be careful, they're messy.
Tzatziki
1 cup plain greek nonfat yogurt
1/2 a small cucumber
Salt and pepper to taste
1 small garlic clove, minced
Squeeze of fresh lemon juice
Put the yogurt in a bowl. Peel the cucumber, then cut it in half lengthwise and remove the seeds. Grate it over the large holes of a box grater. Place the grated cucumber in a clean kitchen towel and ring out the water over the sink. Add the cucumber to the yogurt, along with the other ingredients. Mix well. Taste and adjust the seasonings, as needed. Chill before serving.
Senin, 22 September 2014
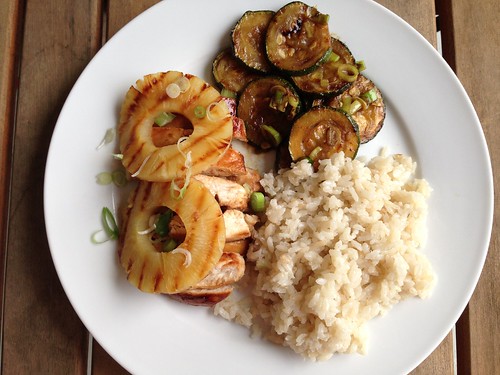
Grilled Hawaiian Chicken with Coconut Rice
As soon as Ashley posted this recipe for Grilled Hawaiian Chicken with Coconut Rice I knew I had to make it as soon as possible. I could practically taste the coconut rice. The only problem is, Baby Girl is allergic to nuts and that includes coconut. Luckily, she was heading to my parent's house for a sleepover so I put it on the menu for that Saturday night.
Do you remember when I mentioned my grill pan suffered a small catastrophe recently? This was the recipe that did it. The brown sugar in the marinade caramelized on the pan and has been next to impossible to remove. Next time we'll be cooking this one on the outdoor grill. And there will definitely be a next time. We couldn't stop oohing and ahhing over this meal. It was absolutely delicious. The rice was our favorite part - the coconut milk adds such a wonderful, rich, creamy, mellow flavor. The rice, combined with the chicken and pineapple, made for a five-star restaurant-quality meal. So, so good. I really wish Baby Girl could join us in eating this one. I know she would love it.
Grilled Hawaiian Chicken with Coconut Rice
As seen on Cheesecurd in Paradise
4 boneless, skinless chicken breasts
1/3 cup soy sauce
1/4 cup pineapple juice (from the pineapple rings)
1/2 cup water
1/2 cup brown sugar
4 scallions, chopped
3 cloves garlic, minced
2 teaspoons fresh ginger, minced
1 teaspoon olive oil
1 can pineapple rings, drained, juice reserved
For the coconut rice:
2 tablespoons butter
1 1/2 cup long grain white rice
1 can coconut milk
water
2 scallions, finely chopped
Place the chicken in a plastic food storage bag. Add the soy sauce, pineapple juice, water, brown sugar, scallions, garlic, and oil, seal the bag and gently toss to coat the chicken in the marinade. Marinate for at least 8 hours, preferably overnight.
Preheat a grill or grill pan over medium heat. Grill the chicken for about 5-6 minutes per side. Remove the chicken from the grill. While it rests, grill the pineapple to give it a slight char. You can serve the chicken whole or slice it into strips before serving.
For the rice: melt the butter in a medium saucepan over medium-high heat. Add the rice, and cook for about 3 minutes stirring occasionally. Pour the can of coconut milk into a measuring cup, then add enough water to equal 3 cups of liquid. Add the coconut milk and water to the rice and stir to combine. Bring to a boil, stir once more and cover the pot. Reduce the heat to low and cook for 20 minutes. Remove the lid and fluff the rice with a fork.
Serve the chicken on a bed of the coconut rice topped with some of the grilled pineapple. Scatter some of the finely chopped scallion over the dish before serving.
Do you remember when I mentioned my grill pan suffered a small catastrophe recently? This was the recipe that did it. The brown sugar in the marinade caramelized on the pan and has been next to impossible to remove. Next time we'll be cooking this one on the outdoor grill. And there will definitely be a next time. We couldn't stop oohing and ahhing over this meal. It was absolutely delicious. The rice was our favorite part - the coconut milk adds such a wonderful, rich, creamy, mellow flavor. The rice, combined with the chicken and pineapple, made for a five-star restaurant-quality meal. So, so good. I really wish Baby Girl could join us in eating this one. I know she would love it.
Grilled Hawaiian Chicken with Coconut Rice
As seen on Cheesecurd in Paradise
4 boneless, skinless chicken breasts
1/3 cup soy sauce
1/4 cup pineapple juice (from the pineapple rings)
1/2 cup water
1/2 cup brown sugar
4 scallions, chopped
3 cloves garlic, minced
2 teaspoons fresh ginger, minced
1 teaspoon olive oil
1 can pineapple rings, drained, juice reserved
For the coconut rice:
2 tablespoons butter
1 1/2 cup long grain white rice
1 can coconut milk
water
2 scallions, finely chopped
Place the chicken in a plastic food storage bag. Add the soy sauce, pineapple juice, water, brown sugar, scallions, garlic, and oil, seal the bag and gently toss to coat the chicken in the marinade. Marinate for at least 8 hours, preferably overnight.
Preheat a grill or grill pan over medium heat. Grill the chicken for about 5-6 minutes per side. Remove the chicken from the grill. While it rests, grill the pineapple to give it a slight char. You can serve the chicken whole or slice it into strips before serving.
For the rice: melt the butter in a medium saucepan over medium-high heat. Add the rice, and cook for about 3 minutes stirring occasionally. Pour the can of coconut milk into a measuring cup, then add enough water to equal 3 cups of liquid. Add the coconut milk and water to the rice and stir to combine. Bring to a boil, stir once more and cover the pot. Reduce the heat to low and cook for 20 minutes. Remove the lid and fluff the rice with a fork.
Serve the chicken on a bed of the coconut rice topped with some of the grilled pineapple. Scatter some of the finely chopped scallion over the dish before serving.
Rabu, 27 Agustus 2014
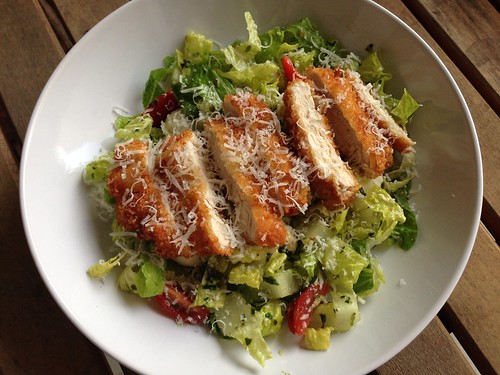
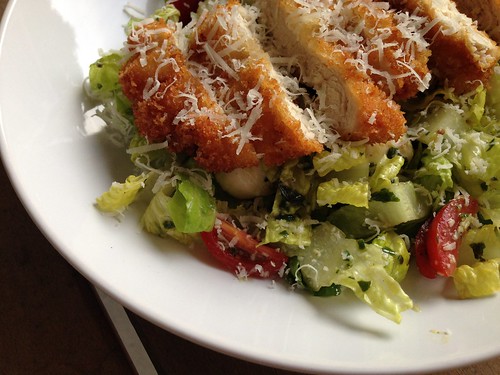
Chicken Parmesan Salad
A few weeks ago I received an issue of Cook's Country magazine. I used to be a subscriber, but in an effort to save money I cancelled my subscription awhile back. I'm not sure if this was a teaser issue to try to entice me back, but it doesn't have a date on it so I'm assuming that's what it is. SP went through it and picked out a few recipes for me to make, including this one for Chicken Parmesan Salad.
I made a few modifications - I switched up the breading method since I've found that panko adheres better when you coat the chicken in flour first, and I swapped out arugula for Romaine hearts since I always have a package on hand. If only I could buy arugula that didn't spoil immediately...
This was a great salad. We were all big fans. I mean, what's not to like about crispy chicken and the summer trinity of tomatoes, mozzarella and basil? Because of Baby Girl's nut allergy I didn't make traditional pesto, simply processed basil leaves with a little oil, salt and pepper and then grated in some Pecorino cheese. I have to be honest - I haven't made pesto with nuts in years and I don't notice a difference.
Chicken Parmesan Salad
As seen in Cook's Country magazine
1 large egg
1 cup flour
1 cup panko
salt and pepper
4 chicken cutlets
6 tablespoons vegetable oil
1/4 cup pesto
1 teaspoon grated lemon zest plus 1 tablespoon juice
12 ounces cherry tomatoes, halved
5 ounces baby arugula, mixed greens or finely shredded Romaine hearts
4 ounces bocconcini, halved
Beat the egg in a shallow dish with a splash of water. Add the flour to a second shallow dish. Combine panko, 1/4 teaspoon salt and 1/4 teaspoon pepper in a third shallow dish. Season each chicken cutlet with salt and pepper. Working with one cutlet at a time, coat the cutlet in flour, then dip into the egg, and finally coat in the panko, pressing to adhere.
Heat 3 tablespoons of vegetable oil in a non-stick skillet over medium-high heat until shimmering. Cook 2 cutlets at a time until golden brown and crispy, about two minutes per side. Transfer to a paper towel-lined plate. Repeat with the remaining oil and chicken. Tent the chicken loosely with foil and let rest for 5 minutes.
Whisk the pesto and lemon zest and juice together in a large bowl. Add the tomatoes, arugula and bocconcini and toss to combine. Season with salt and pepper. Arrange the salad on a serving platter. Slice the chicken into strips and arrange on the salad. Serve.
I made a few modifications - I switched up the breading method since I've found that panko adheres better when you coat the chicken in flour first, and I swapped out arugula for Romaine hearts since I always have a package on hand. If only I could buy arugula that didn't spoil immediately...
This was a great salad. We were all big fans. I mean, what's not to like about crispy chicken and the summer trinity of tomatoes, mozzarella and basil? Because of Baby Girl's nut allergy I didn't make traditional pesto, simply processed basil leaves with a little oil, salt and pepper and then grated in some Pecorino cheese. I have to be honest - I haven't made pesto with nuts in years and I don't notice a difference.
Chicken Parmesan Salad
As seen in Cook's Country magazine
1 large egg
1 cup flour
1 cup panko
salt and pepper
4 chicken cutlets
6 tablespoons vegetable oil
1/4 cup pesto
1 teaspoon grated lemon zest plus 1 tablespoon juice
12 ounces cherry tomatoes, halved
5 ounces baby arugula, mixed greens or finely shredded Romaine hearts
4 ounces bocconcini, halved
Beat the egg in a shallow dish with a splash of water. Add the flour to a second shallow dish. Combine panko, 1/4 teaspoon salt and 1/4 teaspoon pepper in a third shallow dish. Season each chicken cutlet with salt and pepper. Working with one cutlet at a time, coat the cutlet in flour, then dip into the egg, and finally coat in the panko, pressing to adhere.
Heat 3 tablespoons of vegetable oil in a non-stick skillet over medium-high heat until shimmering. Cook 2 cutlets at a time until golden brown and crispy, about two minutes per side. Transfer to a paper towel-lined plate. Repeat with the remaining oil and chicken. Tent the chicken loosely with foil and let rest for 5 minutes.
Whisk the pesto and lemon zest and juice together in a large bowl. Add the tomatoes, arugula and bocconcini and toss to combine. Season with salt and pepper. Arrange the salad on a serving platter. Slice the chicken into strips and arrange on the salad. Serve.
Senin, 18 Agustus 2014
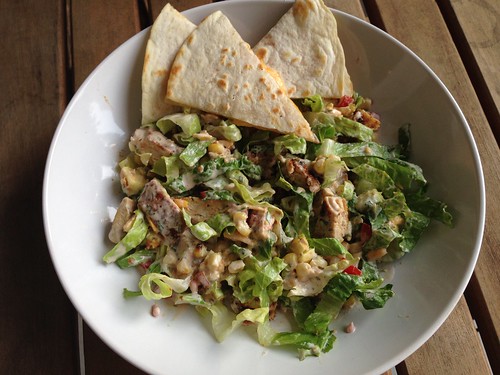
Chicken Taco Salad
I know, I know. I haven't been a great blogger lately. As I said in my July recap post, I've lost my mojo. I'm not making many new recipes and I've had writers block trying to blog the ones I have made.
But this salad...oh man. I love a good dinner salad and this Chicken Taco Salad from Pioneer Woman fit the bill. Lots of fresh veggies mixed with lettuce and grilled chicken.
I opted to grill the chicken rather than cooking it in oil and butter. I also made a quick rub with various spices (chili powder, cumin, garlic powder, onion powder, salt and pepper) rather than use taco seasoning. And since I had some tortillas leftover I decided to make some cheese queadillas as a side dish. Man, there is just something about a plain cheese quesadilla paired with a flavorful salad. Yum.
Chicken Taco Salad
As seen on The Pioneer Woman
Dressing:
3/4 cups ranch dressing
1/4 cup salsa
3 tablespoons finely minced cilantro
Chicken:
2 chicken breasts, cut in half lengthwise
2 tablespoons taco seasoning
cooking spray
Salad:
2 ears corn, shucked
2 romaine hearts, shredded thin
3 roma tomatoes, diced
1/2 cup grated pepper Jack cheese
2 whole avocados, diced
3 scallions, sliced
1/2 cup cilantro
Tortilla chips, crushed slightly
Combine the dressing ingredients in a bowl and stir together. Cover and refrigerate.
Generously season both sides of the chicken breasts with the taco seasoning or spices. Spray a grill pan with cooking spray and heat over medium-high heat. Cook the chicken for 5 minutes, then flip and cook for another 4 minutes. Remove from the grill pan and set aside to cool slightly, then cut it into cubes.
Place the ears of corn on the grill pan. Cook until the corn is browned in spots. Remove from the pan and cut off the kernels with a sharp knife. Set aside.
To assemble the salad, pile the chicken, corn, lettuce, tomatoes, cheese, avocado, scallions, cilantro, and crushed chips on a big platter. Drizzle the dressing all over the top, or serve it on the side so everyone can dress their own salad.
But this salad...oh man. I love a good dinner salad and this Chicken Taco Salad from Pioneer Woman fit the bill. Lots of fresh veggies mixed with lettuce and grilled chicken.
I opted to grill the chicken rather than cooking it in oil and butter. I also made a quick rub with various spices (chili powder, cumin, garlic powder, onion powder, salt and pepper) rather than use taco seasoning. And since I had some tortillas leftover I decided to make some cheese queadillas as a side dish. Man, there is just something about a plain cheese quesadilla paired with a flavorful salad. Yum.
Chicken Taco Salad
As seen on The Pioneer Woman
Dressing:
3/4 cups ranch dressing
1/4 cup salsa
3 tablespoons finely minced cilantro
Chicken:
2 chicken breasts, cut in half lengthwise
2 tablespoons taco seasoning
cooking spray
Salad:
2 ears corn, shucked
2 romaine hearts, shredded thin
3 roma tomatoes, diced
1/2 cup grated pepper Jack cheese
2 whole avocados, diced
3 scallions, sliced
1/2 cup cilantro
Tortilla chips, crushed slightly
Combine the dressing ingredients in a bowl and stir together. Cover and refrigerate.
Generously season both sides of the chicken breasts with the taco seasoning or spices. Spray a grill pan with cooking spray and heat over medium-high heat. Cook the chicken for 5 minutes, then flip and cook for another 4 minutes. Remove from the grill pan and set aside to cool slightly, then cut it into cubes.
Place the ears of corn on the grill pan. Cook until the corn is browned in spots. Remove from the pan and cut off the kernels with a sharp knife. Set aside.
To assemble the salad, pile the chicken, corn, lettuce, tomatoes, cheese, avocado, scallions, cilantro, and crushed chips on a big platter. Drizzle the dressing all over the top, or serve it on the side so everyone can dress their own salad.
Rabu, 02 Juli 2014
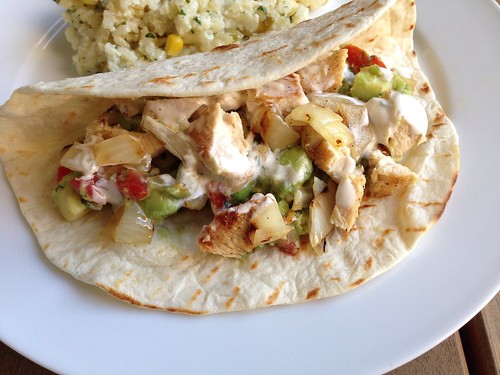
Grilled Chicken Tacos with Spiced Mayo and Avocado Salsa
These Grilled Chicken Tacos with Spiced Mayo and Avocado Salsa are, hands down, my new favorite taco. As soon as I saw them I knew I had to make them. I could almost taste them just by reading the recipe.
I had to make a slight modification because I refuse to pay $1 for one lime when I can't even be guaranteed the lime will have any juice in it. Have you ever bought a lime and found it completely dry? How does that even happen? Lemons are still cheap so I just swapped it out. I also left out the hot sauce because Baby Girl isn't a fan of spicy food.
I prepared these on my indoor grill pan because, as I've mentioned before, we have a charcoal grill and getting that set up on a weeknight just doesn't happen. Since skewers won't fit on the grill pan I cut the chicken breasts in half lengthwise and grilled them before cutting into cubes. Same for the onion - I grilled it in rings and then chopped them. These tacos were so delicious we barely had enough leftover for one lunch the next day.
Grilled Chicken Soft Tacos with Spiced Mayo and Avocado Salsa
As seen on Seeded at the Table, originally from Weber's New Real Grilling
For the chicken:
zest of 1 lemon
1/2 teaspoon ground cumin
Salt & pepper
Olive oil
4 boneless, skinless chicken breasts, cut in half lengthwise
1 large yellow onion, peeled and cut into 3/4-inch rings
1/2 cup mayonnaise
Juice from 1 lemon
1 teaspoon hot sauce (optional)
1/4 teaspoon cumin
For the Avocado Salsa:
2 large avocados, peeled, pitted and diced
2 medium Roma tomatoes, seeded and finely diced
3 scallions, minced
2 tablespoons fresh lemon juice
1 tablespoon chopped cilantro
1/4 teaspoon hot sauce (optional)
8 taco or fajita-size flour tortillas
Preheat grill pan over medium-high heat.
In a large bowl or plastic food storage bag, combine the lemon zest, 1/2 teaspoon cumin, 1/2 teaspoon salt, 1/4 teaspoon black pepper and a few tablespoons of oil. Place the chicken pieces into the bowl or bag and toss to combine until evenly coated with the seasonings. In a separate bag or bowl, toss the onion rings with some oil, salt and pepper.
In a small bowl, whisk together the mayonnaise, lemon juice, hot sauce (if using), and 1/4 teaspoon cumin. Stir in water, 1 teaspoon at a time, until the mixture can be drizzled.
In another bowl, toss together the salsa ingredients and season with salt and pepper, to taste.
Add the onion rings to the grill pan and cook, turning often, until the onions are soft and blackened in spots. Remove from the grill to a bowl and cover with foil or plastic wrap. Add the chicken to the grill pan and cook 5 minutes on one side, then flip and cook another 4 minutes. Remove from the grill and let rest. Add the tortillas to the grill pan to warm and brown in spots, turning once. Cut the chicken and onions into bite-size pieces. Let everyone assemble their own tacos with the mayo and salsa.
I had to make a slight modification because I refuse to pay $1 for one lime when I can't even be guaranteed the lime will have any juice in it. Have you ever bought a lime and found it completely dry? How does that even happen? Lemons are still cheap so I just swapped it out. I also left out the hot sauce because Baby Girl isn't a fan of spicy food.
I prepared these on my indoor grill pan because, as I've mentioned before, we have a charcoal grill and getting that set up on a weeknight just doesn't happen. Since skewers won't fit on the grill pan I cut the chicken breasts in half lengthwise and grilled them before cutting into cubes. Same for the onion - I grilled it in rings and then chopped them. These tacos were so delicious we barely had enough leftover for one lunch the next day.
Grilled Chicken Soft Tacos with Spiced Mayo and Avocado Salsa
As seen on Seeded at the Table, originally from Weber's New Real Grilling
For the chicken:
zest of 1 lemon
1/2 teaspoon ground cumin
Salt & pepper
Olive oil
4 boneless, skinless chicken breasts, cut in half lengthwise
1 large yellow onion, peeled and cut into 3/4-inch rings
1/2 cup mayonnaise
Juice from 1 lemon
1 teaspoon hot sauce (optional)
1/4 teaspoon cumin
For the Avocado Salsa:
2 large avocados, peeled, pitted and diced
2 medium Roma tomatoes, seeded and finely diced
3 scallions, minced
2 tablespoons fresh lemon juice
1 tablespoon chopped cilantro
1/4 teaspoon hot sauce (optional)
8 taco or fajita-size flour tortillas
Preheat grill pan over medium-high heat.
In a large bowl or plastic food storage bag, combine the lemon zest, 1/2 teaspoon cumin, 1/2 teaspoon salt, 1/4 teaspoon black pepper and a few tablespoons of oil. Place the chicken pieces into the bowl or bag and toss to combine until evenly coated with the seasonings. In a separate bag or bowl, toss the onion rings with some oil, salt and pepper.
In a small bowl, whisk together the mayonnaise, lemon juice, hot sauce (if using), and 1/4 teaspoon cumin. Stir in water, 1 teaspoon at a time, until the mixture can be drizzled.
In another bowl, toss together the salsa ingredients and season with salt and pepper, to taste.
Add the onion rings to the grill pan and cook, turning often, until the onions are soft and blackened in spots. Remove from the grill to a bowl and cover with foil or plastic wrap. Add the chicken to the grill pan and cook 5 minutes on one side, then flip and cook another 4 minutes. Remove from the grill and let rest. Add the tortillas to the grill pan to warm and brown in spots, turning once. Cut the chicken and onions into bite-size pieces. Let everyone assemble their own tacos with the mayo and salsa.
Rabu, 04 Juni 2014
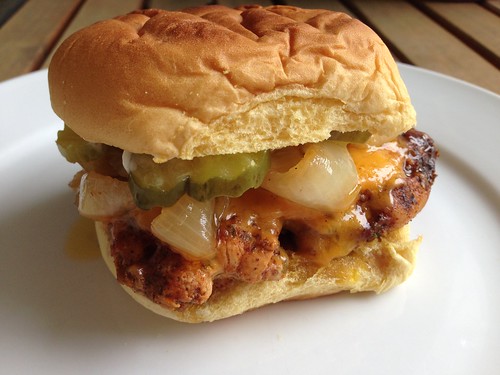
Grilled BBQ Chicken Sandwiches with Brown Sugar Grilled Onions
From the moment Cassie posted these Grilled BBQ Chicken Sandwiches with Brown Sugar Grilled Onions on Instagram I fell in love. I hounded her to write up a blog post so I could make them and, happily, she obliged.
I was finally able to put them on the menu recently and all I can say is wow. These are incredible. Absolutely delicious. The citrus from the orange juice really comes through and I love the tang of the BBQ sauce with the pickles and the sweet onions. Heaven.
The only change I made was to sub the Italian dressing in Cassie's recipe for olive oil and the seasonings that go into the dressing. We don't keep bottled Italian dressing on hand and since I had almost all the spices I needed I figured I'd just make my own marinade.
You have got to try these sandwiches. You won't be sorry. I'm already plotting when I can make them again.
Grilled BBQ Chicken Sandwiches with Brown Sugar Grilled Onions
As seen on Cassie Craves, spice mixture adapted from allrecipes
4 chicken breasts
olive oil
1 teaspoon garlic salt
1 teaspoon onion powder
1 teaspoon white sugar
2 teaspoons dried oregano
1/4 teaspoon ground black pepper
1/4 teaspoon dried basil
1 teaspoon dried parsley
dash of seasoned salt
1 tablespoon Worcestershire sauce
Juice of 1 orange
2 teaspoons chili powder
BBQ sauce
1-2 large sweet Vidalia onions, sliced into thick rings
2 tablespoons olive oil
2 tablespoons brown sugar
1/2 teaspoon salt
1/4 teaspoon freshly-ground black pepper
1 cup shredded cheddar cheese
4 sandwich buns, cut in half
Butter
Sliced pickles
Mayonnaise
In a large food storage bag, combine the oil, seasonings, Worcestershire, orange juice, and chili powder. Add the chicken, close the bag, and toss to combine. Marinate overnight.
Heat grill pan over medium-high heat. Toss together the onion rings, olive oil, brown sugar, and salt and pepper in a bowl. Add the onions and cook until they are tender and charred. Remove to a bowl and cover to keep warm.
Add the chicken to the grill. Cook chicken 5 minutes on one side, brush with BBQ sauce, then flip and cook 4 minutes. Brush the other side with BBQ sauce. With one minute left to cook, top each chicken breast with some of the cheese. Cover the grill pan with foil and let the cheese melt. Remove from the pan.
While the chicken is cooking, butter the cut side of the buns and toast them.
Serve each chicken breast topped with a pile of onions, some more BBQ sauce, pickles and mayonnaise.
I was finally able to put them on the menu recently and all I can say is wow. These are incredible. Absolutely delicious. The citrus from the orange juice really comes through and I love the tang of the BBQ sauce with the pickles and the sweet onions. Heaven.
The only change I made was to sub the Italian dressing in Cassie's recipe for olive oil and the seasonings that go into the dressing. We don't keep bottled Italian dressing on hand and since I had almost all the spices I needed I figured I'd just make my own marinade.
You have got to try these sandwiches. You won't be sorry. I'm already plotting when I can make them again.
Grilled BBQ Chicken Sandwiches with Brown Sugar Grilled Onions
As seen on Cassie Craves, spice mixture adapted from allrecipes
4 chicken breasts
olive oil
1 teaspoon garlic salt
1 teaspoon onion powder
1 teaspoon white sugar
2 teaspoons dried oregano
1/4 teaspoon ground black pepper
1/4 teaspoon dried basil
1 teaspoon dried parsley
dash of seasoned salt
1 tablespoon Worcestershire sauce
Juice of 1 orange
2 teaspoons chili powder
BBQ sauce
1-2 large sweet Vidalia onions, sliced into thick rings
2 tablespoons olive oil
2 tablespoons brown sugar
1/2 teaspoon salt
1/4 teaspoon freshly-ground black pepper
1 cup shredded cheddar cheese
4 sandwich buns, cut in half
Butter
Sliced pickles
Mayonnaise
In a large food storage bag, combine the oil, seasonings, Worcestershire, orange juice, and chili powder. Add the chicken, close the bag, and toss to combine. Marinate overnight.
Heat grill pan over medium-high heat. Toss together the onion rings, olive oil, brown sugar, and salt and pepper in a bowl. Add the onions and cook until they are tender and charred. Remove to a bowl and cover to keep warm.
Add the chicken to the grill. Cook chicken 5 minutes on one side, brush with BBQ sauce, then flip and cook 4 minutes. Brush the other side with BBQ sauce. With one minute left to cook, top each chicken breast with some of the cheese. Cover the grill pan with foil and let the cheese melt. Remove from the pan.
While the chicken is cooking, butter the cut side of the buns and toast them.
Serve each chicken breast topped with a pile of onions, some more BBQ sauce, pickles and mayonnaise.
Jumat, 23 Mei 2014
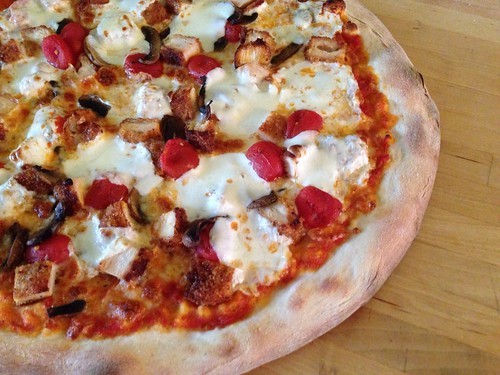
Pizza Fridays: Chicken Parm Pizza
This is one of those pizzas that came about because of leftovers. I had some leftover crispy chicken from the Crispy Chicken with Egg and Arugula and some grape tomatoes that were starting to get wrinkly. I figured I'd add in the standard pizza sauce and cheese and chicken parm pizza was born.
I had a few mushrooms leftover as well so I added those too, but I'm leaving them off the recipe below since they aren't part of a traditional chicken parm recipe.
Chicken Parm Pizza
1/2 pint grape tomatoes
olive oil
salt and pepper
1 ball of pizza dough
1/2 cup marinara or pizza sauce
4 oz mozzarella cheese, shredded
4 oz fresh mozzarella, cut into slices
1 cup crispy breaded chicken, cut into bite-size pieces
Flour, for dusting and rolling
Preheat the oven to 400 degrees. Arrange tomatoes on a foil-lined baking sheet; drizzle with olive oil, sprinkle with salt and pepper, and toss to combine. Cook for 20 minutes or until browned and bursting.
Place a pizza stone in your oven and turn the oven up to 550 degrees.
Lay a sheet of parchment paper the size of your pizza stone on a work surface. Lightly dust with flour. Roll or stretch the dough into a 12- to 14-inch circle on the parchment paper. Spread the pizza sauce in a thin layer over the dough, leaving a half-inch margin around the outer edges. Sprinkle the shredded mozzarella over the top, then add the pieces of chicken and roasted tomatoes. Top with the sliced fresh mozzarella.
Transfer the pizza to the hot pizza stone. Bake for 8-10 minutes, until the cheese is bubbling and the crust is golden brown.
Remove the pizza from the oven, let it cool for about 5 minutes before slicing and serving.
I had a few mushrooms leftover as well so I added those too, but I'm leaving them off the recipe below since they aren't part of a traditional chicken parm recipe.
Chicken Parm Pizza
1/2 pint grape tomatoes
olive oil
salt and pepper
1 ball of pizza dough
1/2 cup marinara or pizza sauce
4 oz mozzarella cheese, shredded
4 oz fresh mozzarella, cut into slices
1 cup crispy breaded chicken, cut into bite-size pieces
Flour, for dusting and rolling
Preheat the oven to 400 degrees. Arrange tomatoes on a foil-lined baking sheet; drizzle with olive oil, sprinkle with salt and pepper, and toss to combine. Cook for 20 minutes or until browned and bursting.
Place a pizza stone in your oven and turn the oven up to 550 degrees.
Lay a sheet of parchment paper the size of your pizza stone on a work surface. Lightly dust with flour. Roll or stretch the dough into a 12- to 14-inch circle on the parchment paper. Spread the pizza sauce in a thin layer over the dough, leaving a half-inch margin around the outer edges. Sprinkle the shredded mozzarella over the top, then add the pieces of chicken and roasted tomatoes. Top with the sliced fresh mozzarella.
Transfer the pizza to the hot pizza stone. Bake for 8-10 minutes, until the cheese is bubbling and the crust is golden brown.
Remove the pizza from the oven, let it cool for about 5 minutes before slicing and serving.
Senin, 19 Mei 2014
Crispy Chicken with Egg and Arugula
I love a good crispy chicken recipe. I also love anything topped with a fried egg. When Nicole posted this recipe for Crispy Chicken with Egg and Arugula I was stoked - two of my favorite things in one recipe? Brilliant.
This was such a comforting meal with the crispy chicken, creamy mashed potatoes and arugula with a tangy dressing. The fried egg with its runny yolk was delicious with the chicken. There's nothing complicated about this recipe but it's so, so good.
Crispy Baked Chicken with Egg and Arugula Salad
As seen on Prevention RD
1 egg + 1 tablespoon water
1/2 cup panko
1/2 cup breadcrumbs
2 tablespoons grated Parmesan
1/4 teaspoon pepper and salt
1/4 teaspoon garlic powder
1 lb chicken, each breast cut in half lengthwise
vegetable or canola oil
4 eggs
Arugula Salad:
8 oz fresh arugula
1 shallot, finely minced
1 teaspoon Dijon mustard
2 teaspoon red wine vinegar
1/4 cup extra-virgin olive oil
1 teaspoon sugar
1 teaspoon honey
1/4 teaspoon each salt and freshly ground black pepper
In one of two shallow bowls, whisk together the egg and 1 tablespoon water. In the second bowl, combine the panko, breadcrumbs, Parmesan, salt, pepper, and garlic powder.
Heat vegetable oil in a medium skillet (enough to shallow-fry the chicken). Working one at a time, dredge the chicken in the egg mixture and then in the breadcrumb mixture, coating both sides completely. Fry in batches until golden and crispy, about 5 minutes per side; remove to a paper-towel-lined plate.
Meanwhile, prepare the arugula salad. Whisk together the shallot, Dijon, vinegar, olive oil, sugar, honey, salt and pepper. Drizzle the dressing over the arugula and toss to combine.
In a small skillet, cook the eggs to your liking � over easy, medium, or hard.
To assemble, plate each chicken breast and top with 1 egg and 1/4 of the salad mixture. Serve immediately.
This was such a comforting meal with the crispy chicken, creamy mashed potatoes and arugula with a tangy dressing. The fried egg with its runny yolk was delicious with the chicken. There's nothing complicated about this recipe but it's so, so good.
Crispy Baked Chicken with Egg and Arugula Salad
As seen on Prevention RD
1 egg + 1 tablespoon water
1/2 cup panko
1/2 cup breadcrumbs
2 tablespoons grated Parmesan
1/4 teaspoon pepper and salt
1/4 teaspoon garlic powder
1 lb chicken, each breast cut in half lengthwise
vegetable or canola oil
4 eggs
Arugula Salad:
8 oz fresh arugula
1 shallot, finely minced
1 teaspoon Dijon mustard
2 teaspoon red wine vinegar
1/4 cup extra-virgin olive oil
1 teaspoon sugar
1 teaspoon honey
1/4 teaspoon each salt and freshly ground black pepper
In one of two shallow bowls, whisk together the egg and 1 tablespoon water. In the second bowl, combine the panko, breadcrumbs, Parmesan, salt, pepper, and garlic powder.
Heat vegetable oil in a medium skillet (enough to shallow-fry the chicken). Working one at a time, dredge the chicken in the egg mixture and then in the breadcrumb mixture, coating both sides completely. Fry in batches until golden and crispy, about 5 minutes per side; remove to a paper-towel-lined plate.
Meanwhile, prepare the arugula salad. Whisk together the shallot, Dijon, vinegar, olive oil, sugar, honey, salt and pepper. Drizzle the dressing over the arugula and toss to combine.
In a small skillet, cook the eggs to your liking � over easy, medium, or hard.
To assemble, plate each chicken breast and top with 1 egg and 1/4 of the salad mixture. Serve immediately.
Jumat, 25 April 2014
Chicken Chorizo Patty Melts
Awhile back I made a big batch of Mexican-style chorizo using my friend Melissa's recipe. I froze it in 8oz portions and then pretty much forgot all about it. SP has been bugging me to do a better job of keeping the freezer at a manageable level so I asked him to find some recipes using fresh chorizo. When he sent me the link for these Chicken Chorizo Patty Melts I knew I had to try them ASAP.
Man oh man, people, words cannot describe these sandwiches. The chorizo isn't spicy but it has great flavor. You can top anything with caramelized onions and I'll be a fan. And the melted cheese just brings it all together. I especially love that these are served on flat breads. I'm a big fan of flat breads. We bought a package a week last year so I could make these flat bread pizzas. So, so good.
If you have the time and the freezer space I highly recommend making Melissa's chorizo to use in this recipe. I can't speak to the quality and flavor of supermarket fresh chorizo because mine doesn't carry it. All they have is the fully-cooked variety, which doesn't have much flavor at all and wouldn't work in this recipe anyway. But if you have access to excellent, flavorful fresh chorizo, by all means, use that.
Chicken Chorizo Patty Melts
From Sunny Anderson
Patties:
1 pound ground chicken
8 ounces fresh chorizo
2 cloves garlic, minced
2 tablespoons chopped fresh oregano (or 2 teaspoons dried)
1 teaspoon kosher salt
Onions:
1 tablespoon butter
1 tablespoon vegetable oil
1 large or 2 regular Vidalia or sweet onions, sliced
Kosher salt and freshly ground black pepper
spreadable or softened butter
4 oblong/rectangular flat breads (can also use naan or pita)
8 to 10 slices Jarlsberg or Swiss cheese
mayo
In a large bowl, gently but thoroughly combine the chicken, chorizo, garlic, oregano and salt. Form into equal-sized thin patties (I got 5) roughly the size of the bread you will be using or in the case of the flat bread, 1/2 the bread size. Cover the patties with plastic wrap and refrigerate for at least 30 minutes.
In a medium saute pan on medium heat melt the butter with the oil. Add the onion and season with a pinch of salt and a couple of grinds of pepper, to taste. Saute until the onions are caramelized, about 35 minutes, and set aside.
Preheat a griddle or grill pan over medium-high heat. Spread a thin layer of butter on both sides of the flat breads. Add them to the grill pan and cook until both sides have nice grill marks and are starting to get crispy. Remove to a plate.
Add the patties to the grill and cook until crispy on the edges and cooked through, about 4 minutes per side. Add a slice of cheese to each patty in the last minute of cooking. Remove to a plate. Assemble the sandwiches by spreading some mayo on the bread. Place one of the patties on half the flat bread, then top with some of the onions. Fold the other half of the bread over and serve.
Man oh man, people, words cannot describe these sandwiches. The chorizo isn't spicy but it has great flavor. You can top anything with caramelized onions and I'll be a fan. And the melted cheese just brings it all together. I especially love that these are served on flat breads. I'm a big fan of flat breads. We bought a package a week last year so I could make these flat bread pizzas. So, so good.
If you have the time and the freezer space I highly recommend making Melissa's chorizo to use in this recipe. I can't speak to the quality and flavor of supermarket fresh chorizo because mine doesn't carry it. All they have is the fully-cooked variety, which doesn't have much flavor at all and wouldn't work in this recipe anyway. But if you have access to excellent, flavorful fresh chorizo, by all means, use that.
Chicken Chorizo Patty Melts
From Sunny Anderson
Patties:
1 pound ground chicken
8 ounces fresh chorizo
2 cloves garlic, minced
2 tablespoons chopped fresh oregano (or 2 teaspoons dried)
1 teaspoon kosher salt
Onions:
1 tablespoon butter
1 tablespoon vegetable oil
1 large or 2 regular Vidalia or sweet onions, sliced
Kosher salt and freshly ground black pepper
spreadable or softened butter
4 oblong/rectangular flat breads (can also use naan or pita)
8 to 10 slices Jarlsberg or Swiss cheese
mayo
In a large bowl, gently but thoroughly combine the chicken, chorizo, garlic, oregano and salt. Form into equal-sized thin patties (I got 5) roughly the size of the bread you will be using or in the case of the flat bread, 1/2 the bread size. Cover the patties with plastic wrap and refrigerate for at least 30 minutes.
In a medium saute pan on medium heat melt the butter with the oil. Add the onion and season with a pinch of salt and a couple of grinds of pepper, to taste. Saute until the onions are caramelized, about 35 minutes, and set aside.
Preheat a griddle or grill pan over medium-high heat. Spread a thin layer of butter on both sides of the flat breads. Add them to the grill pan and cook until both sides have nice grill marks and are starting to get crispy. Remove to a plate.
Add the patties to the grill and cook until crispy on the edges and cooked through, about 4 minutes per side. Add a slice of cheese to each patty in the last minute of cooking. Remove to a plate. Assemble the sandwiches by spreading some mayo on the bread. Place one of the patties on half the flat bread, then top with some of the onions. Fold the other half of the bread over and serve.
Senin, 21 April 2014
Goat Cheese and Apple Chicken
Recently I had half a log of goat cheese leftover and I knew exactly what I wanted to make with it. I'd had Nicole's Goat Cheese and Apple Chicken saved for awhile and couldn't wait to try it.
We all enjoyed this a lot, although I found myself wishing for a bit more of the goat cheese. The apple flavor was less pronounced than I thought it would be but I loved the crunch mixed with the creaminess of the cheese. I'll definitely make this one again.
Goat Cheese and Apple Chicken
As seen on Prevention RD
non-stick cooking spray
3 large boneless, skinless chicken breasts, halved lengthwise
salt and pepper
20 saltine crackers
1 teaspoon garlic salt
1 egg
2 tablespoons water
2 tablespoons olive oil
4 oz goat cheese, at room temperature
1 apple, peeled, cored, and diced
Preheat the oven to 350. Line a baking dish with aluminum foil and spray with non-stick spray. Season chicken with salt and pepper.
Add the saltines to a food processor and pulse to make crumbs. You could also add the crackers to a bag and smash them into crumbs. Place the crumbs in a shallow bowl or pie plate and add the garlic salt. In another shallow bowl or pie plate, whisk the egg with a fork, then add the water. Dip the seasoned chicken into the egg and then the cracker mixture.
Heat a non-stick pan over medium heat and add the oil. Cook the chicken on both sides until brown and crispy, about 5 minutes per side. Place the chicken in the baking dish.
In another small bowl combine the goat cheese and the apple. Spread the mixture evenly over the chicken breasts.
Bake the chicken for about 10-15 minutes or until cheese is warm and browned. Remove from oven and serve hot.
We all enjoyed this a lot, although I found myself wishing for a bit more of the goat cheese. The apple flavor was less pronounced than I thought it would be but I loved the crunch mixed with the creaminess of the cheese. I'll definitely make this one again.
Goat Cheese and Apple Chicken
As seen on Prevention RD
non-stick cooking spray
3 large boneless, skinless chicken breasts, halved lengthwise
salt and pepper
20 saltine crackers
1 teaspoon garlic salt
1 egg
2 tablespoons water
2 tablespoons olive oil
4 oz goat cheese, at room temperature
1 apple, peeled, cored, and diced
Preheat the oven to 350. Line a baking dish with aluminum foil and spray with non-stick spray. Season chicken with salt and pepper.
Add the saltines to a food processor and pulse to make crumbs. You could also add the crackers to a bag and smash them into crumbs. Place the crumbs in a shallow bowl or pie plate and add the garlic salt. In another shallow bowl or pie plate, whisk the egg with a fork, then add the water. Dip the seasoned chicken into the egg and then the cracker mixture.
Heat a non-stick pan over medium heat and add the oil. Cook the chicken on both sides until brown and crispy, about 5 minutes per side. Place the chicken in the baking dish.
In another small bowl combine the goat cheese and the apple. Spread the mixture evenly over the chicken breasts.
Bake the chicken for about 10-15 minutes or until cheese is warm and browned. Remove from oven and serve hot.
Jumat, 11 April 2014
Linguine with Crispy Chicken, Roasted Tomatoes, and Caramelized Onion Cream Sauce
When Cassie first posted a photo of this Linguine with Crispy Chicken, Roasted Tomatoes, and Caramelized Onion Cream Sauce on Facebook I was hooked. And then she posted the recipe on her blog and I knew I had to make it. It's got everything I love in one dish - pasta, crispy chicken, tomatoes and caramelized onions. Yum!!
I was able to prep some of the components during the day, which made it easier to throw together at the end of the day. Baby Girl is an excellent eater (and very polite - she always tells me she loves my cooking) but she doesn't usually proclaim anything as her favorite. After her first bite of this dish she told me she loved it and it was her favorite meal. After every bite she told me I had to make this again and again and again.
We all enjoyed this and it reheated well, which is pretty impressive for a cream-based pasta dish. Everything comes together so well. I particularly liked the apple juice in the onions - it added just a hint of sweetness. I was worried this would be heavy but it was actually pretty light. I can't wait to honor Baby Girl's request and make this again.
Linguine with Crispy Chicken, Roasted Tomatoes, and Caramelized Onion Cream Sauce
As seen on Cassie Craves
8 ounces linguine, cooked according to package directions
Parmesan cheese
For the roasted tomatoes:
1 pint cherry tomatoes
1 tablespoon olive oil
Salt and pepper to taste
For the chicken:
1 large chicken breast, cut into bite-sized chunks
1 egg, beaten
1 cup panko breadcrumbs
1/2 cup Italian-style breadcrumbs
1 teaspoon Italian seasoning
1/2 teaspoon garlic powder
1/2 teaspoon each salt and black pepper
Vegetable oil for frying
For the sauce:
1 large onion, thinly sliced
2 tablespoons butter
1 tablespoon olive oil
3 cloves garlic, minced
1/2 cup apple juice
1 cup heavy cream (I used 1/2 and 1/2)
Salt and pepper to taste
Preheat the oven to 400 degrees. Arrange tomatoes on a foil-lined baking sheet; drizzle with olive oil, sprinkle with salt and pepper, and toss to combine. Cook for 20 minutes or until browned and bursting.
Meanwhile, add the beaten egg to a large bowl. Mix together the panko, Italian breadcrumbs, Italian seasoning, garlic powder, and salt and pepper in a separate bowl. Heat vegetable oil in a medium saucepan (enough to shallow-fry the chicken). Dip the chicken pieces in the egg, then in the breadcrumb mixture. Fry in batches until golden and crispy; remove to a paper-towel-lined plate.
Melt the butter and olive oil in a large skillet. Add the onions, season with salt and pepper, and cook over medium-low heat, stirring frequently, until onions are fragrant and caramelized. Add the garlic; cook and stir for 30 seconds. Raise heat to medium-high and stir in the apple juice, scraping the bottom of the pan with a wooden spoon to pick up any browned bits. Let the apple juice reduce slightly, then stir in the cream. Reduce heat back to medium-low and heat gently until thickened; taste for seasoning and add salt and pepper to taste.
Gently stir together the reserved tomatoes, crispy chicken, and pasta. Add the sauce and toss gently to combine. Serve with parmesan cheese.
I was able to prep some of the components during the day, which made it easier to throw together at the end of the day. Baby Girl is an excellent eater (and very polite - she always tells me she loves my cooking) but she doesn't usually proclaim anything as her favorite. After her first bite of this dish she told me she loved it and it was her favorite meal. After every bite she told me I had to make this again and again and again.
We all enjoyed this and it reheated well, which is pretty impressive for a cream-based pasta dish. Everything comes together so well. I particularly liked the apple juice in the onions - it added just a hint of sweetness. I was worried this would be heavy but it was actually pretty light. I can't wait to honor Baby Girl's request and make this again.
Linguine with Crispy Chicken, Roasted Tomatoes, and Caramelized Onion Cream Sauce
As seen on Cassie Craves
8 ounces linguine, cooked according to package directions
Parmesan cheese
For the roasted tomatoes:
1 pint cherry tomatoes
1 tablespoon olive oil
Salt and pepper to taste
For the chicken:
1 large chicken breast, cut into bite-sized chunks
1 egg, beaten
1 cup panko breadcrumbs
1/2 cup Italian-style breadcrumbs
1 teaspoon Italian seasoning
1/2 teaspoon garlic powder
1/2 teaspoon each salt and black pepper
Vegetable oil for frying
For the sauce:
1 large onion, thinly sliced
2 tablespoons butter
1 tablespoon olive oil
3 cloves garlic, minced
1/2 cup apple juice
1 cup heavy cream (I used 1/2 and 1/2)
Salt and pepper to taste
Preheat the oven to 400 degrees. Arrange tomatoes on a foil-lined baking sheet; drizzle with olive oil, sprinkle with salt and pepper, and toss to combine. Cook for 20 minutes or until browned and bursting.
Meanwhile, add the beaten egg to a large bowl. Mix together the panko, Italian breadcrumbs, Italian seasoning, garlic powder, and salt and pepper in a separate bowl. Heat vegetable oil in a medium saucepan (enough to shallow-fry the chicken). Dip the chicken pieces in the egg, then in the breadcrumb mixture. Fry in batches until golden and crispy; remove to a paper-towel-lined plate.
Melt the butter and olive oil in a large skillet. Add the onions, season with salt and pepper, and cook over medium-low heat, stirring frequently, until onions are fragrant and caramelized. Add the garlic; cook and stir for 30 seconds. Raise heat to medium-high and stir in the apple juice, scraping the bottom of the pan with a wooden spoon to pick up any browned bits. Let the apple juice reduce slightly, then stir in the cream. Reduce heat back to medium-low and heat gently until thickened; taste for seasoning and add salt and pepper to taste.
Gently stir together the reserved tomatoes, crispy chicken, and pasta. Add the sauce and toss gently to combine. Serve with parmesan cheese.
Langganan:
Postingan (Atom)